플러터 스터디 (2)
이 글은 골든래빗 《코드팩토리의 플러터 프로그래밍》의 스터디 내용 입니다.
4장. 다트 3.0 신규 문법
레코드
포지셔널 파라미터를 이용한 레코드
void main() {
  (String, int) minji = ('민지', 20);
  print(minji); // (민지, 20)
  print(minji.$1); // 민지
}
네임드 파라미터를 이용한 레코드
포지셔널 파라미터와 다르게 입력 순서를 지킬 필요가 없다.
void main() {
  ({String name, int age}) minji = (
    name: '민지',
    age: 20,
  );
  print(minji); // (age: 20, name: 민지)
}
👩🏻💻 왜 인덱스가 1부터 시작하지 않을까? 찾아보다가 더 요상한 것도 알게 되었다. 네임드와 포지셔널 파라미터를 섞어쓸 수 있으며, $<position> 접근 방식은 네임드 파라미터를 건너뛴다는 것이다. 안타깝게도 인덱스가 왜 1부터 시작인지는 찾을 수가 없었다.
var record = ('first', a: 2, b: true, 'last');

print(record.$1); // Prints 'first'
print(record.a); // Prints 2
print(record.b); // Prints true
print(record.$2); // Prints 'last'
구조 분해
반환된 타입을 그대로 복제해서 타입 내부에 각각의 값을 직접 추출해오는 문법
리스트
void main() {
  final [minji, haerin] = ['민지', '해린'];
  print(minji); // 민지
  print(haerin); // 해린
}
리스트 + 스프레드 연산자
void main() {
  final numbers = [1, 2, 3, 4, 5, 6, 7, 8];

  // 스프레드 연산자를 사용하면 중간의 필요없는 값들을 버릴 수 있다.
  final [x, y, ..., z] = numbers;
  print(x); // 1
  print(y); // 2
  print(z); // 8
}
맵
void main() {
  final minjiMap = {'name': '민지', 'age': 19};
  final {'name': name, 'age': age} = minjiMap;

  print('name: $name'); // name: 민지
  print('age: $age'); // age: 19
}
클래스
void main() {
  final minji = Idol(name: '민지', age: 19);
  final Idol(name: name, age: age) = minji; // 생성자 구조와 똑같이 구조 분해

  print(name); // 민지
  print(age); // 19
}

class Idol {
  final String name;
  final int age;

  Idol({
    required this.name,
    required this.age,
  });
}
switch 문
표현식 기능
다트 3.0 부터는 switch문을 함수처럼 사용하여 직접 값을 반환받을 수 있는 절 기능이 추가되었다.
void main() {
  String dayKor = '월요일';

  String dayEnglish = switch (dayKor) {
      '월요일' => 'Monday',
      '화요일' => 'Tuesday',
      '수요일' => 'Wednesday',
      '목요일' => 'Thursday',
      '금요일' => 'Friday',
      '토요일' => 'Saturday',
      '일요일' => 'Sunday',
      _ => 'Not Found'
  };

  print(dayEnglish); // Monday
}
패턴 매칭
void switcher(dynamic anything) {
  switch (anything) {
    case 'aaa':
      print('match: aaa');
      break;
    case [1, 2]:
      print('match: [1, 2]');
      break;
    case [_, _, _]:
      print('match [_,_,_]');
      break;
    case [int a, int b]:
      print('match: [int $a, int $b]');
      break;
    case (String a, int b):
      print('match: (String: $a, int: $b)');
      break;
    default:
      print('no match');
  }
}

void main() {
  switcher('aaa'); // match: aaa
  switcher([1, 2]); // match: [1, 2]
  switcher([3, 4, 5]); // match [_,_,_]
  switcher([6, 7]); // match: [int 6, int 7]
  switcher(('민지', 19)); // match: (String: 민지, int: 19)
  switcher(8); // no match
}
엄격한 검사exhaustiveness checking
코드가 입력받을 수 있는 모든 조건을 전부 확인하고 있는지 체크하는 기술
void main() {
  bool? val; // true, false, null이 될 수 있음

  // null 조건을 입력하지 않았기 때문에 에러 발생
  // null case를 추가하거나 default case를 추가해야 에러가 사라짐
  switch (val) {
    case true:
      print('true');
    case false:
      print('false');
  }
}
보호 구문
switch문에 when 키워드로 보호 구문guard clause을 추가할 수 있도록 업데이트 되었다.
void main() {
  (int a, int b) val = (1, -1);

  switch(val) {
    case (1, _) when val.$2 > 0:
      print('1, _');
      break;
    default:
      print('default'); // default
  }
}
클래스 제한자
- 모든 클래스 제한자는
class키워드 앞에 명시한다. - 👩🏻💻 각 제한자들을 귀여운 비유와 함께 설명해둔 블로그: Quick reminder about dart 3 class modifiers
base 제한자
- 오직 상속만 가능하다. (구현 불가능)
- base 클래스의 자식 클래스는 base, final, sealed 제한자를 사용해야 한다.
final 제한자
- 외부에서 class가 더이상 상속(extend), 구현(implement)될 수 없도록 한다.
- base 제한자의 기능을 모두 포함한다.
interface 제한자
- 클래스를 외부 파일에서 상속받지 못하고 재정의만 할 수 있도록 제한하는 역할
- extend 불가능, implement 가능
sealed 제한자
- 외부에서 상속(extend), 구현(implement)가 불가능하다.
- 컴파일러가 모든 하위 유형을 인식할 수 있기 때문에 엄격한(exhaustive) 검사가 가능하다.
sealed class Vehicle {}

class Car extends Vehicle {}

class Truck implements Vehicle {}

class Bicycle extends Vehicle {}

String getVehicleSound(Vehicle vehicle) {
  // ERROR: The switch is missing the Bicycle subtype or a default case.
  return switch (vehicle) {
    Car() => 'vroom',
    Truck() => 'VROOOOMM',
  };
}
mixin 제한자
이름 그대로 mixin 클래스이다. 이전에 class 키워드로 생성된 mixin 들은 더이상 mixin으로 쓰일 수 없다.
5장. 플러터 입문하기
플러터 소개
플러터 구조 살펴보기
- 임베더 계층: 하드웨어와 가장 가까운 로우 레벨, 각 플랫폼의 네이티브 언어로 작성되어 있다.
- 엔진 계층: 대부분 C++로 작성, 플러터 코어 API와 스키아 그래픽 엔진, 파일시스템, 네트워크 기능 등이 정의되어 있다.
- 프레임워크 계층: 위젯, 애니메이션, 머티리얼 패키지, 쿠퍼티노 패키지 등이 있다.
플러터가 스키아 엔진과 직접 통신한다 👉 어떤 플랫폼이든 스키아 엔진을 지원한다면 플러터가 컴파일되고 실행되도록 구현할 수 있다
플러터는 위젯을 스키아 엔진에 직접 그려내고 필요한 제스처 및 이벤트 브릿지를 통하지 않고 실행 👉 리액트 네이티브에 비해 상당히 빠른 퍼포먼스
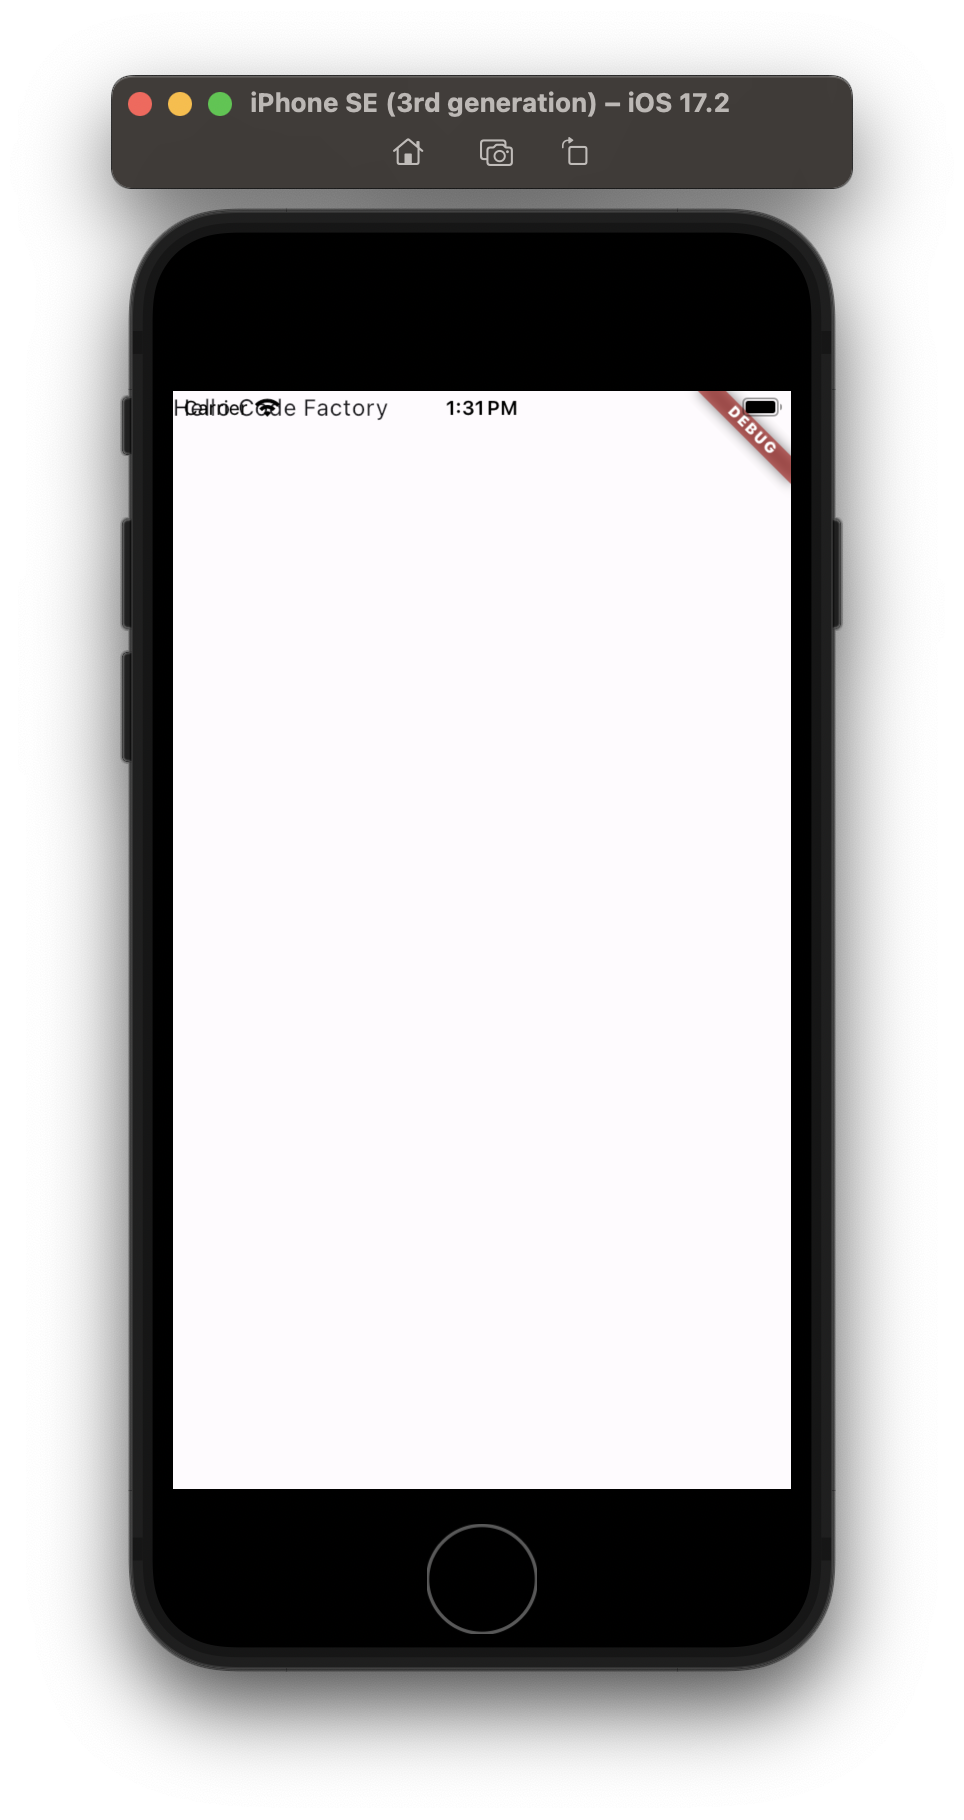
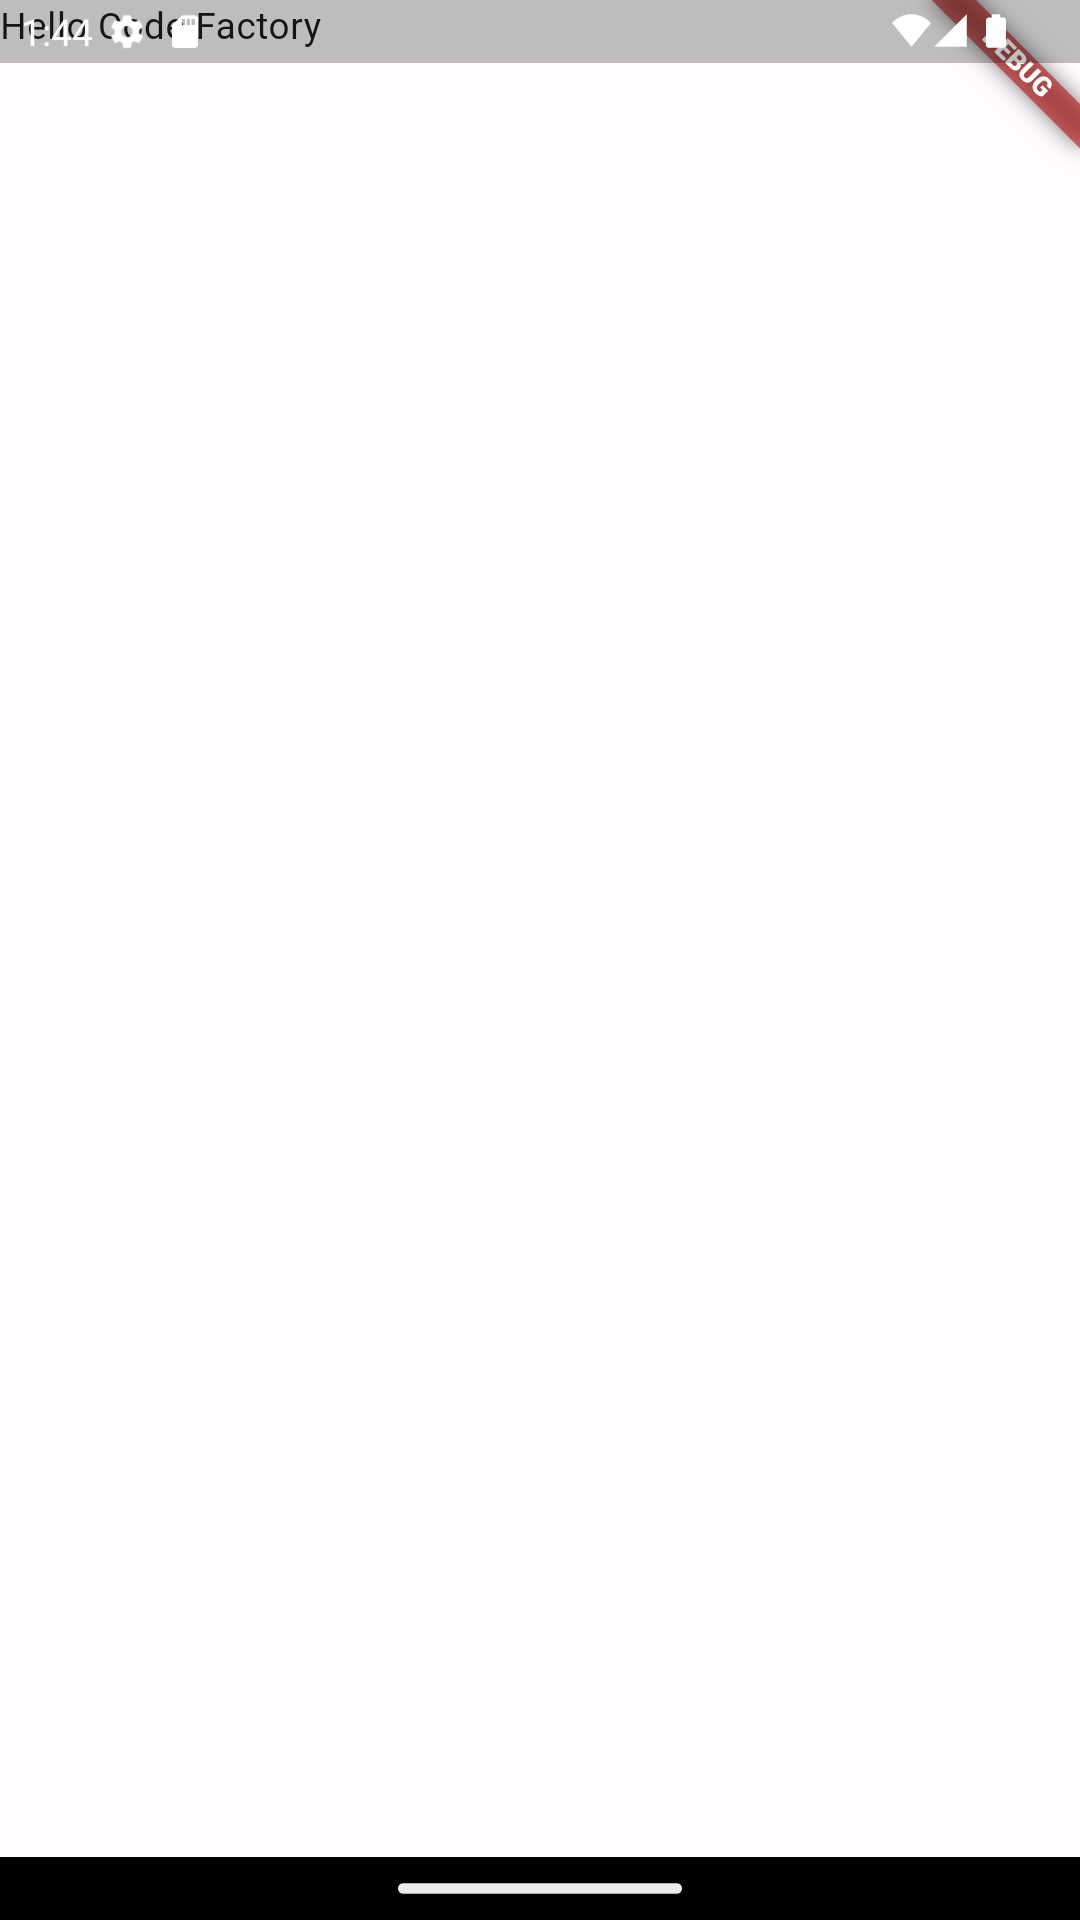
Hello Flutter 앱 만들기
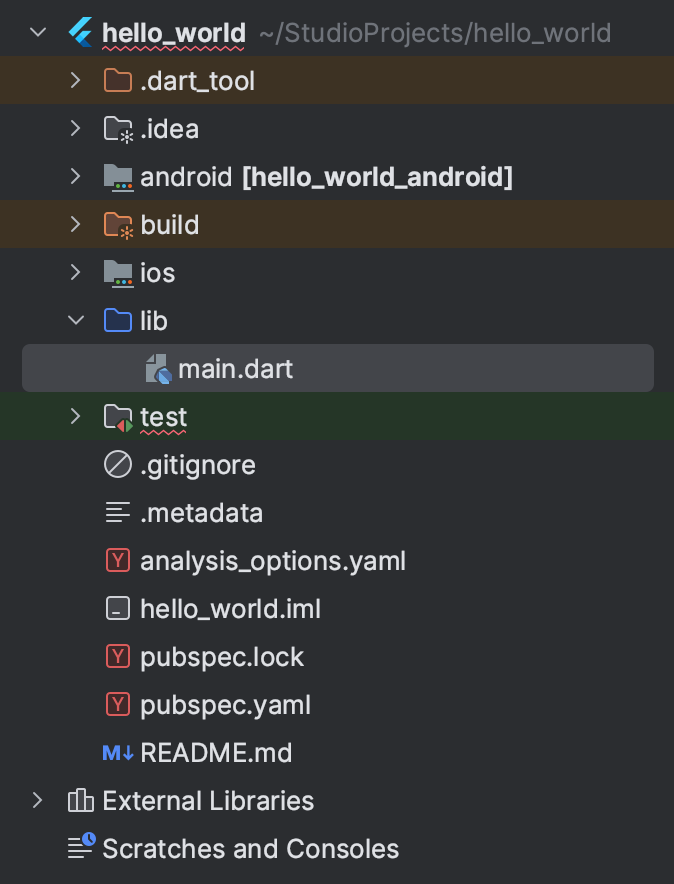
안드로이드 스튜디오에서 [New Flutter Project]를 통해 프로젝트를 생성하면 다음과 같은 파일들이 생성된다.
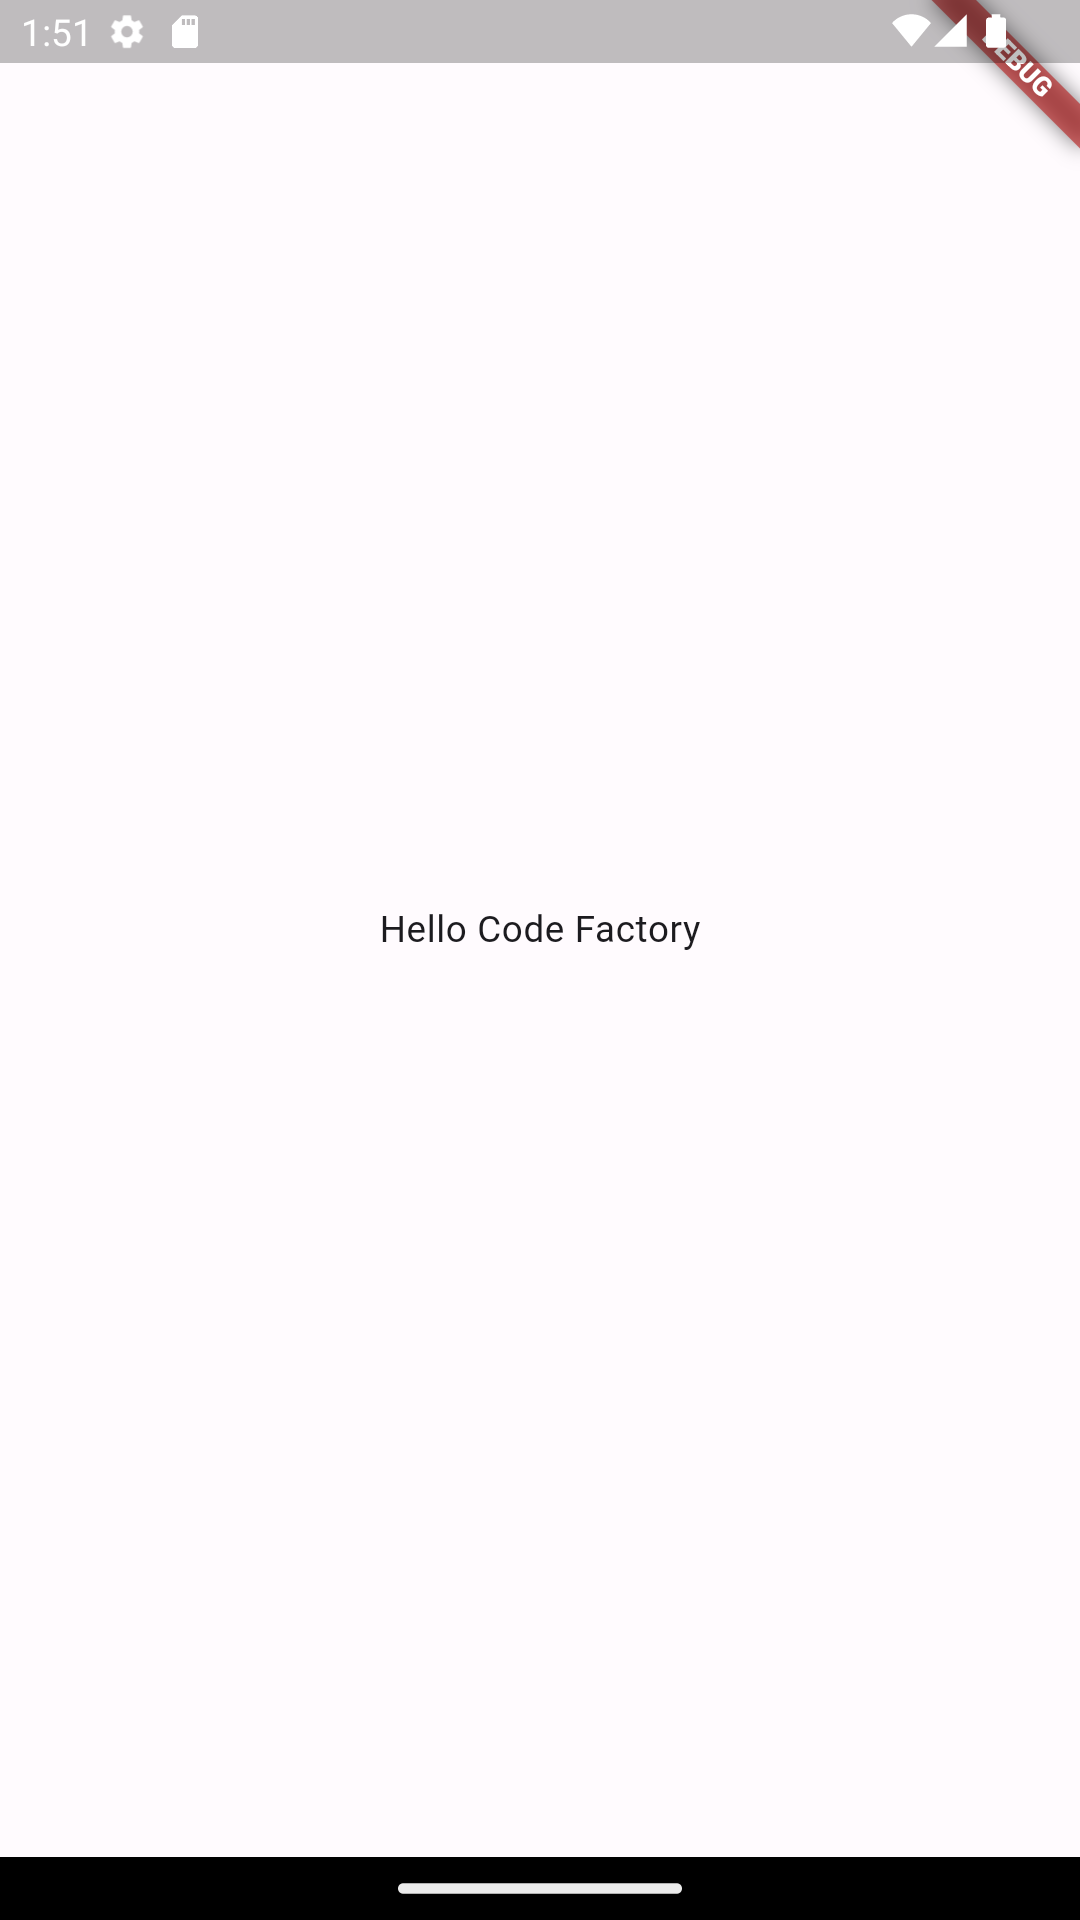
lib/main.dart 파일을 수정하여 'Hello Code Factory'를 출력해보자.
import 'package:flutter/material.dart';

void main() {
  runApp(
    MaterialApp(
      home: Scaffold(
        body: Text(
          'Hello Code Factory',
        ),
      ),
    ),
  );
}
MaterialApp: 머티리얼 디자인 기반의 위젯들을 사용하게 해주는 위젯Scaffold: 화면 전체를 차지하며 레이아웃을 도와주고 UI 관련 특수 기능을 제공한다. ex) 스낵바, 앱바, 탭바
시뮬레이터에서 위 코드를 실행해보자.
- iOS
- 안드로이드
Center 위젯으로 중앙 정렬
import 'package:flutter/material.dart';

void main() {
  runApp(
    MaterialApp(
      home: Scaffold(
        body: Center( // 👈 Center 위젯 추가
          child: Text(
            'Hello Code Factory',
          ),
        ),
      ),
    ),
  );
}
👩🏻💻 Hot Reload가 왜 안되지?
Text를 변경 후 저장하면, 아래와 같은 로그를 볼 수 있지만 시뮬레이터 속 내용은 변하지 않는다.
Performing hot reload...
Syncing files to device sdk gphone64 x86 64...
Reloaded 1 of 696 libraries in 774ms (compile: 29 ms, reload: 392 ms, reassemble: 305 ms).
D/EGL_emulation( 4457): app_time_stats: avg=6604.28ms min=6604.28ms max=6604.28ms count=1
Flutter 문서 How to perform a hot reload에서 다음과 같은 내용을 확인할 수 있다.
A code change has a visible effect only if the modified Dart code is run again after the change. Specifically, a hot reload causes all the existing widgets to rebuild. Only code involved in the rebuilding of the widgets is automatically re-executed. The main() and initState() functions, for example, are not run again.
핫 리로드는 위젯의 build()를 확인하여 변경 사항을 적용한다는 것이다.
StatelessWidget를 상속해서 build() 메소드를 재정의해보았다.
import 'package:flutter/material.dart';

void main() {
  runApp(MyApp());
}

class MyApp extends StatelessWidget{
  @override
  Widget build(BuildContext context) {
    return MaterialApp(
      home: Scaffold(
        body: Center(
          child: Text(
            'Hello Code Factory',
          ),
        ),
      ),
    );
  }
}
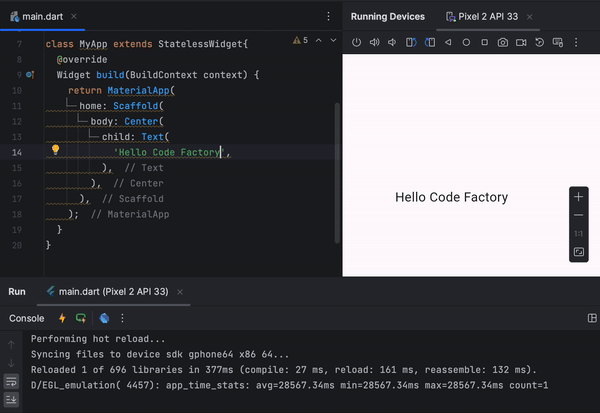
Hot Reload 성공! 😆
6장. 기본 위젯 알아보기
위젯 소개
- 자식을 하나만 갖는 대표적인 위젯 (
child매개변수를 받음)- Container 위젯: 컨테이너 역할, 배경색, 너비와 높이, 테두리 등의 디자인을 지정할 수 있다.
- GestureDetector 위젯: 탭, 드래그, 더블 클릭 같은 제스처 기능이 자식 위젯에 인식 됐을 때 함수를 실행할 수 있다.
- SizedBox 위젯: 높이와 너비를 지정하는 위젯, Container 위젯과 다르게 디자인적 요소는 적용할 수 없다. (퍼포먼스 측면에서 더 효율적)
- 다수의 자식을 입력할 수 있는 위젯 (
children매개변수를 받음)- Column 위젯: 모든 자식 위젯들을 세로로 배치
- Row 위젯: 모든 자식 위젯들을 가로로 배치
- ListView 위젯: 리스트 구현에 사용. 입력된 위젯이 화면을 벗어나면 스크롤이 가능해진다.
Children과 Child의 차이점
child와 children 매개변수를 동시에 입력받는 위젯은 존재하지 않는다.
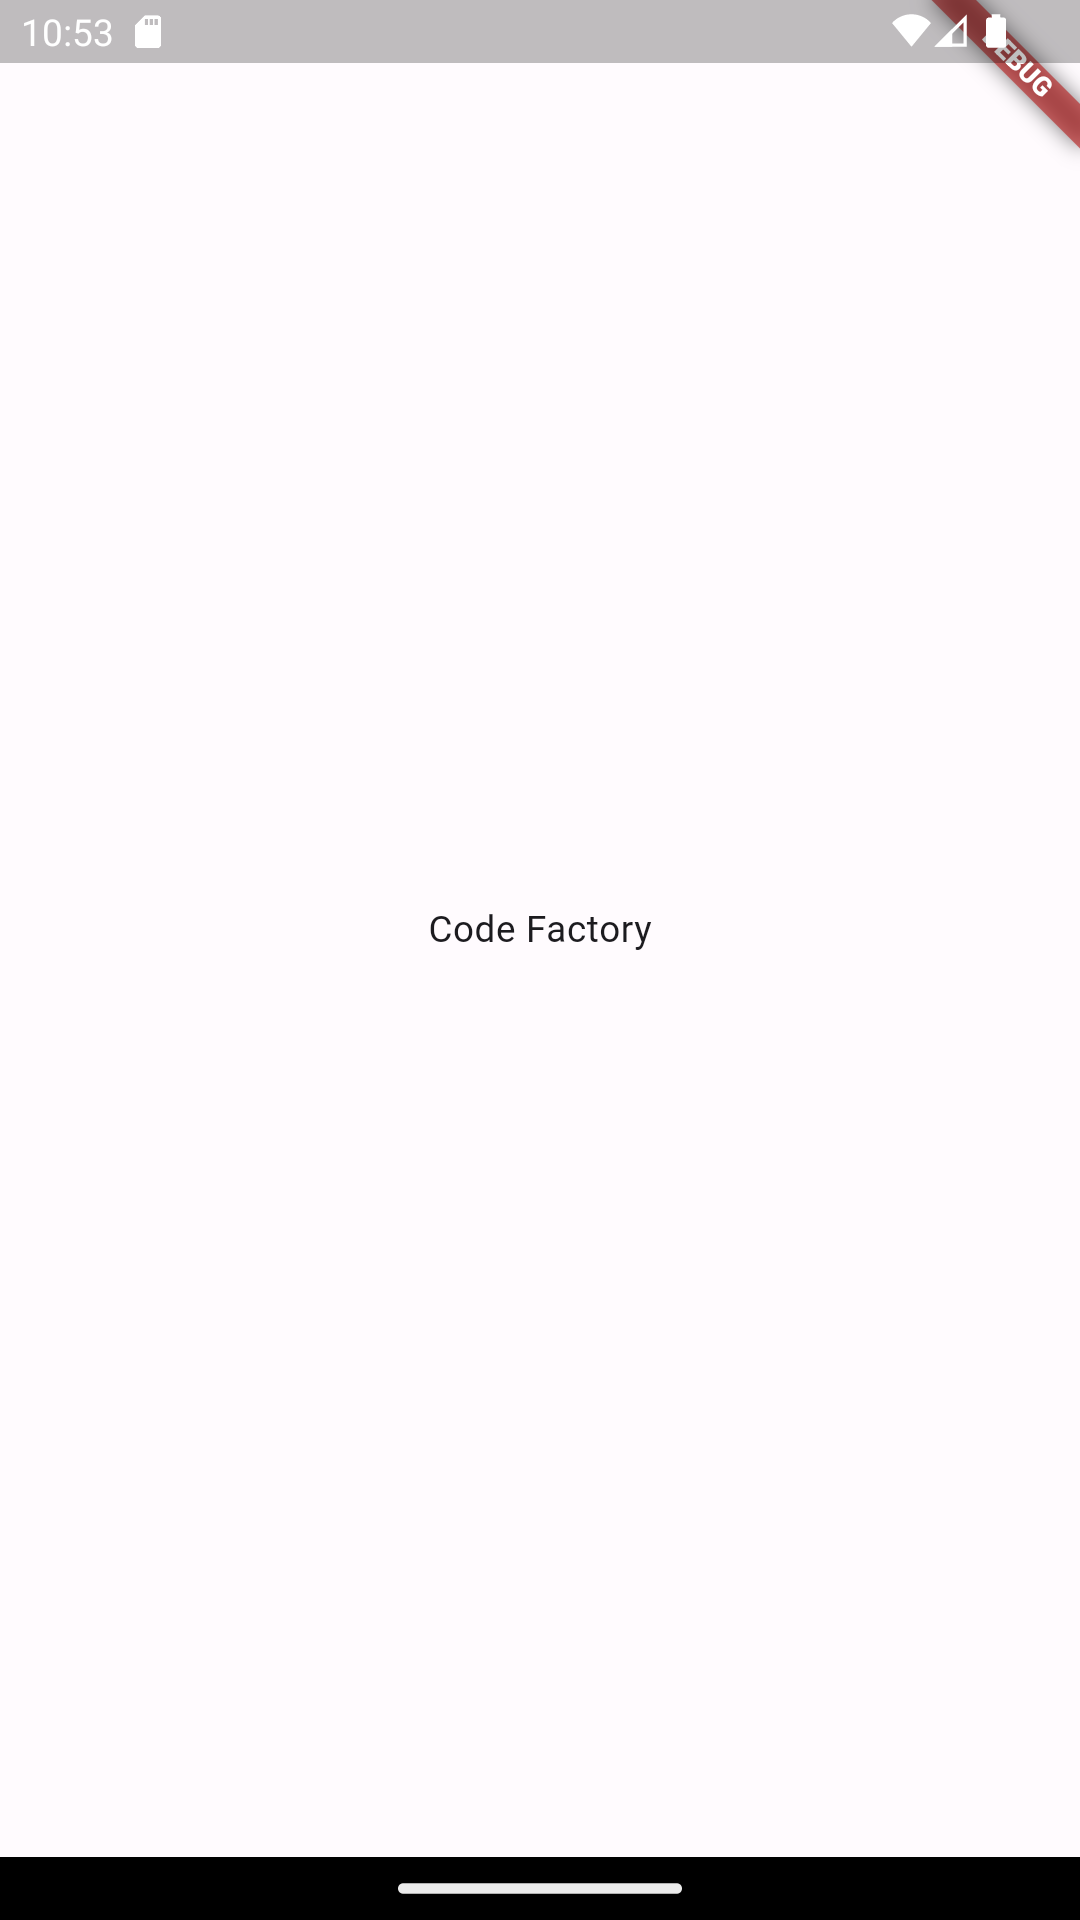
(👩🏻💻 책 예제는 여전히 Hot Reload가 안되기 때문에 안드로이드 스튜디오의 Hot Restart를 사용해서 실습을 진행했다.)
import 'package:flutter/material.dart';

void main() {
  runApp(
    MaterialApp(
      home: Scaffold(
        body: Center(
          child: Text(
            'Code Factory', // 하나의 위젯만 가운데 정렬 가능
          ),
        ),
      ),
    ),
  );
}
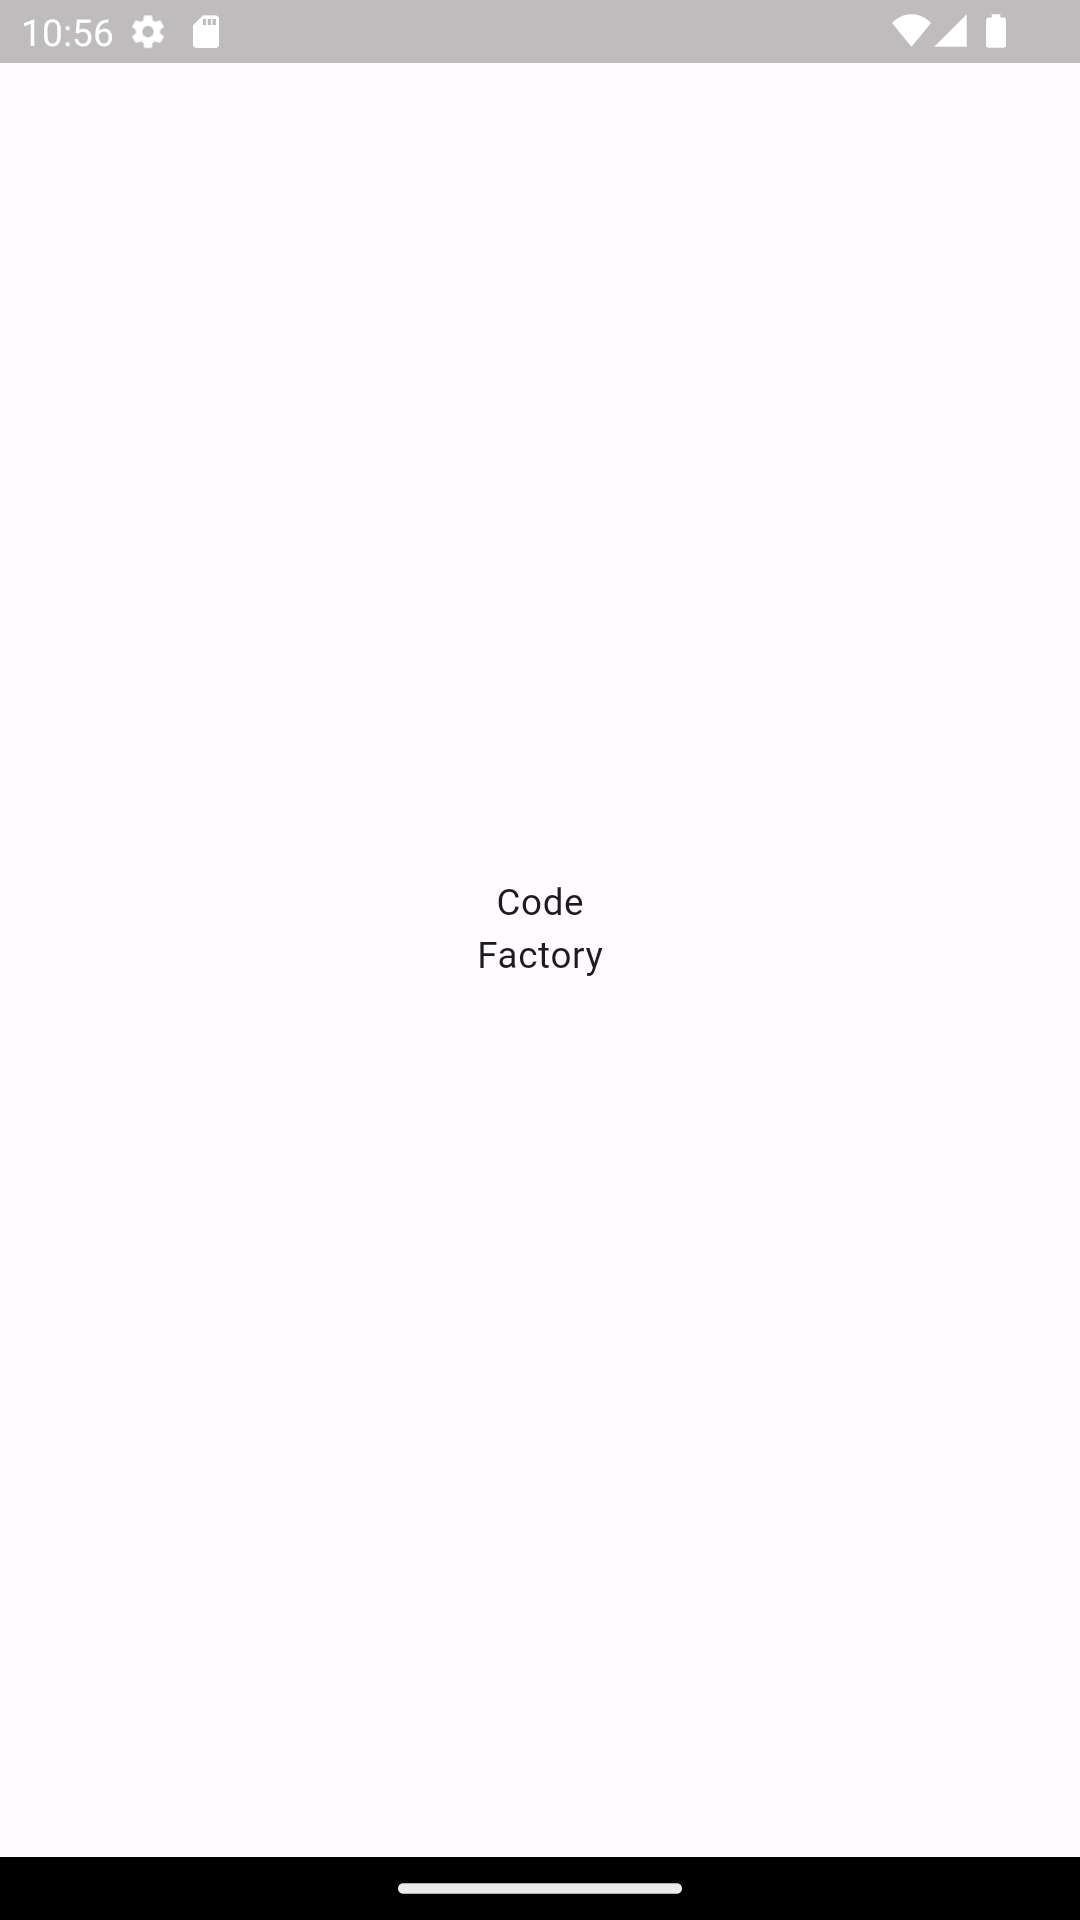
import 'package:flutter/material.dart';

void main() {
  runApp(
    MaterialApp(
      debugShowCheckedModeBanner: false,
      home: Scaffold(
        body: SizedBox(
          width: double.infinity,
          child: Column(
            mainAxisAlignment: MainAxisAlignment.center,
            children: [ // 여러 위젯을 Column 위젯에 입력 가능
              Text('Code'),
              Text('Factory'),
            ],
          )
        ),
      ),
    ),
  );
}
텍스트 관련 위젯
import 'package:flutter/material.dart';
void main() {
runApp(MyApp());
}
class MyApp extends StatelessWidget {
@override
Widget build(BuildContext context) {
return MaterialApp(
home: Scaffold(
body: Center(
child: Text(
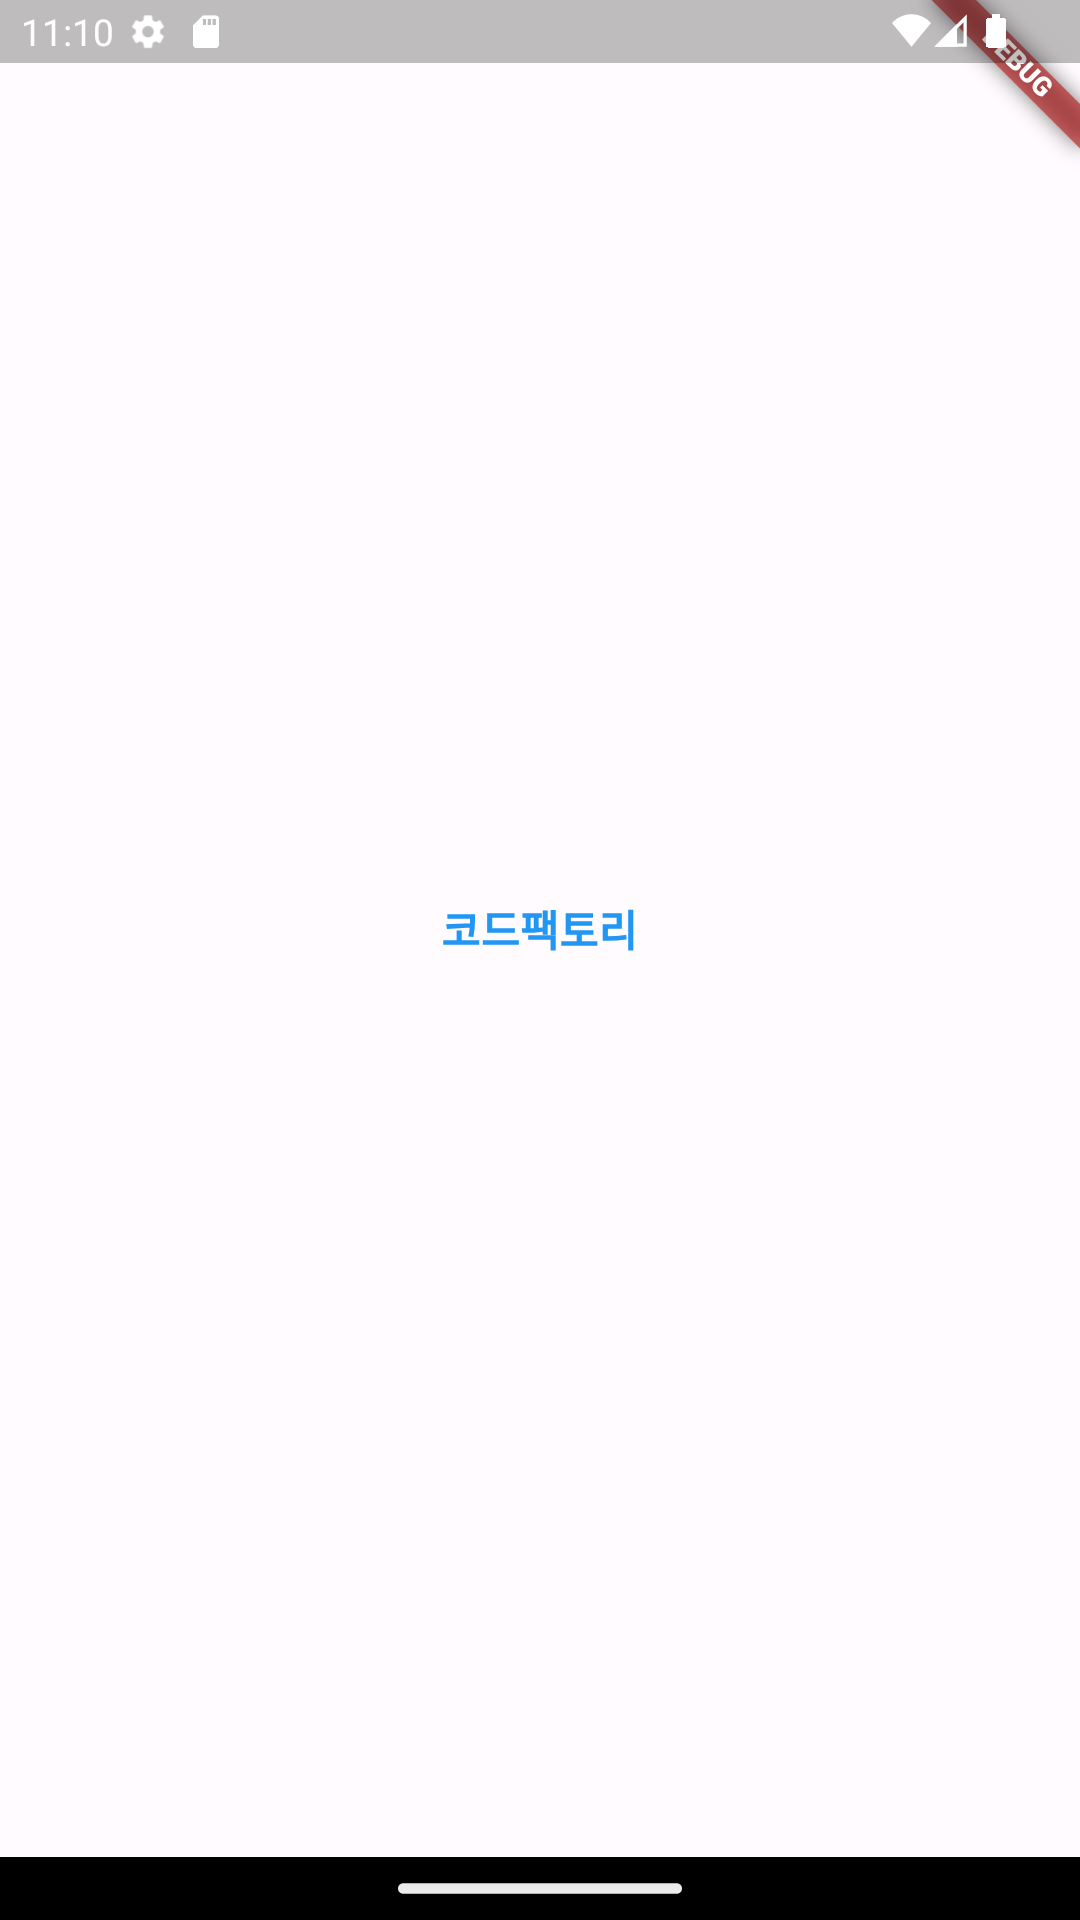
'코드팩토리', // 작성하고 싶은 글
style: TextStyle( // 글자에 스타일 적용
fontSize: 16.0, // 글자 크기
fontWeight: FontWeight.w700, // 글자 굵기
color: Colors.blue, // 글자 색상
),
),
),
),
);
}
}
제스처 관련 위젯
사용자가 키보드로 글자를 입력하는 행위 외의 모든 입력을 제스처라고 부른다. 제스처 관련 위젯은 특정 제스처가 입력됐을 때 인지하고 콜백 함수를 실행한다.
Button 위젯
import 'package:flutter/material.dart';
void main() {
runApp(MyApp());
}
class MyApp extends StatelessWidget {
@override
Widget build(BuildContext context) {
return MaterialApp(
home: Scaffold(
body: Center(
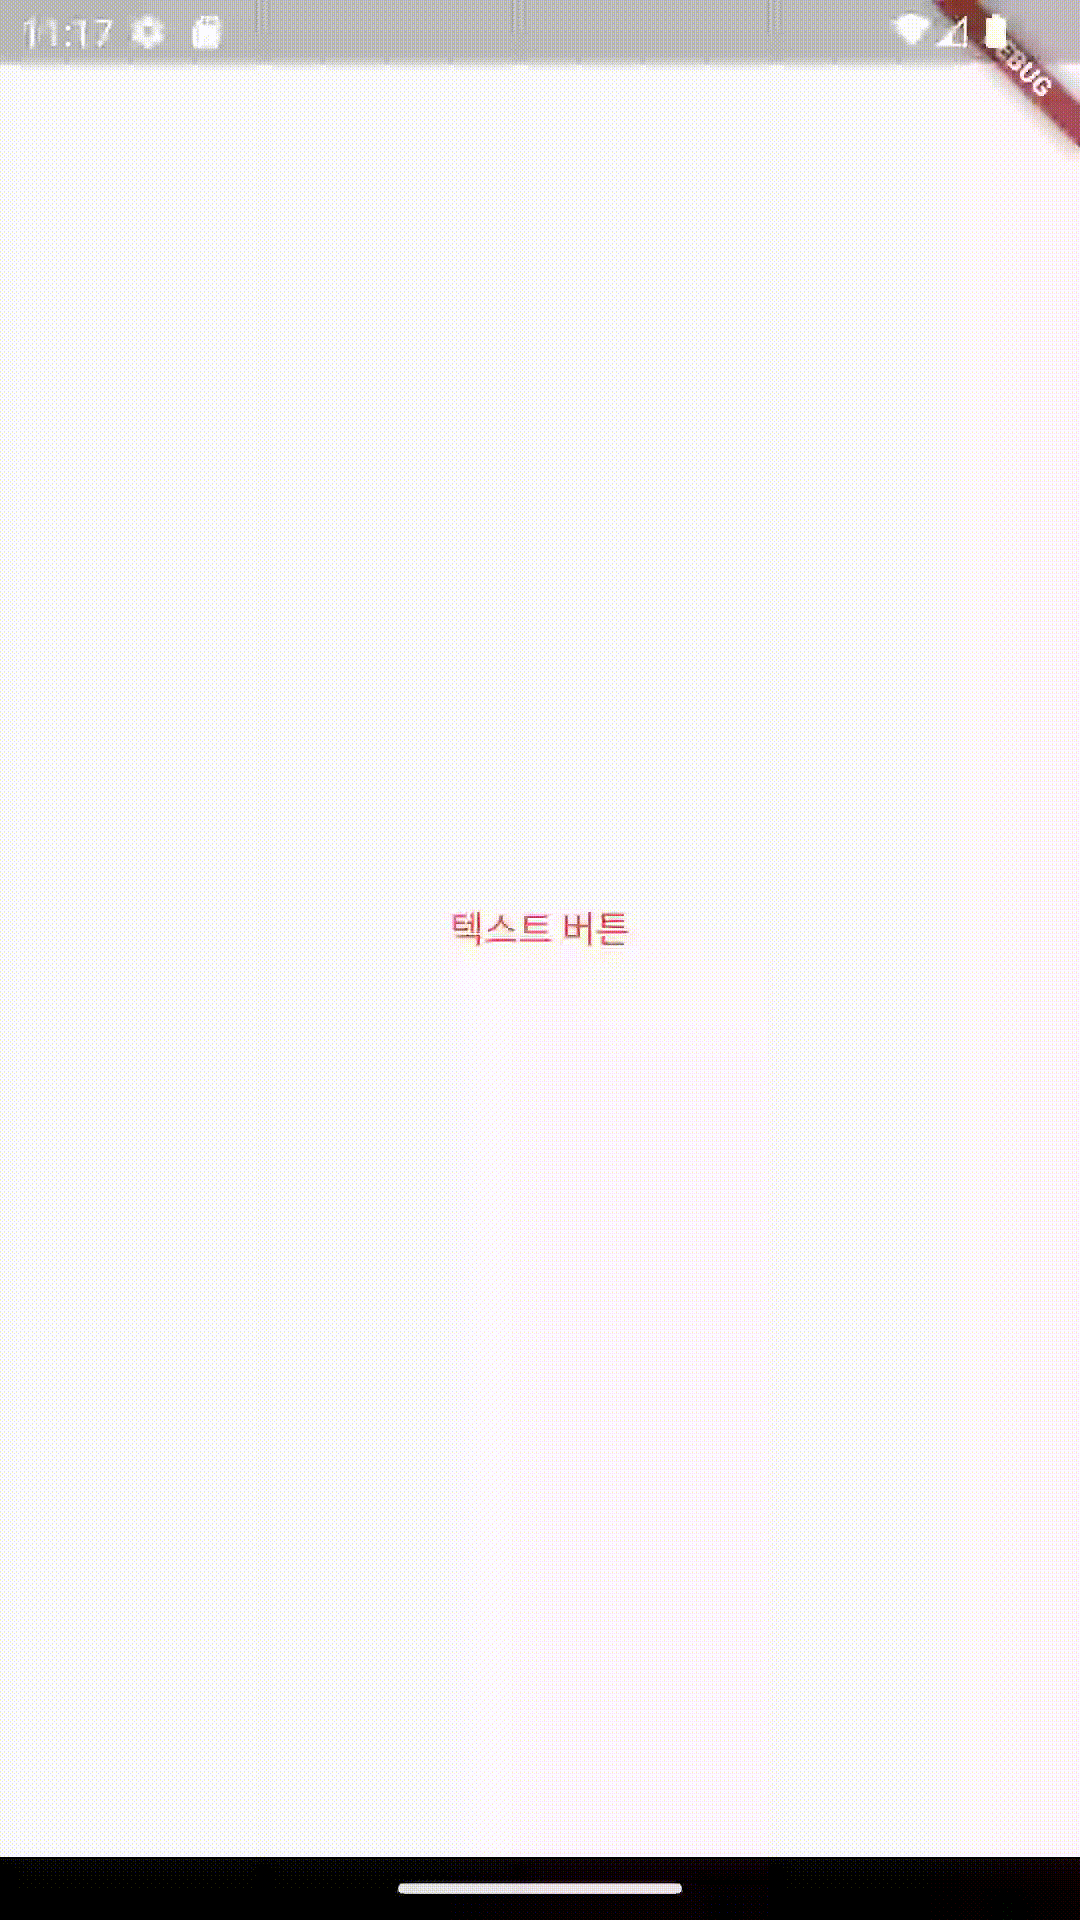
child: TextButton(
onPressed: () {}, // 클릭시 실행
style: TextButton.styleFrom( // 스타일 지정
foregroundColor: Colors.red, // 주색상 지정
),
child: Text('텍스트 버튼'), // 버튼에 넣을 위젯
),
),
),
);
}
}
import 'package:flutter/material.dart';
void main() {
runApp(MyApp());
}
class MyApp extends StatelessWidget {
@override
Widget build(BuildContext context) {
return MaterialApp(
home: Scaffold(
body: Center(
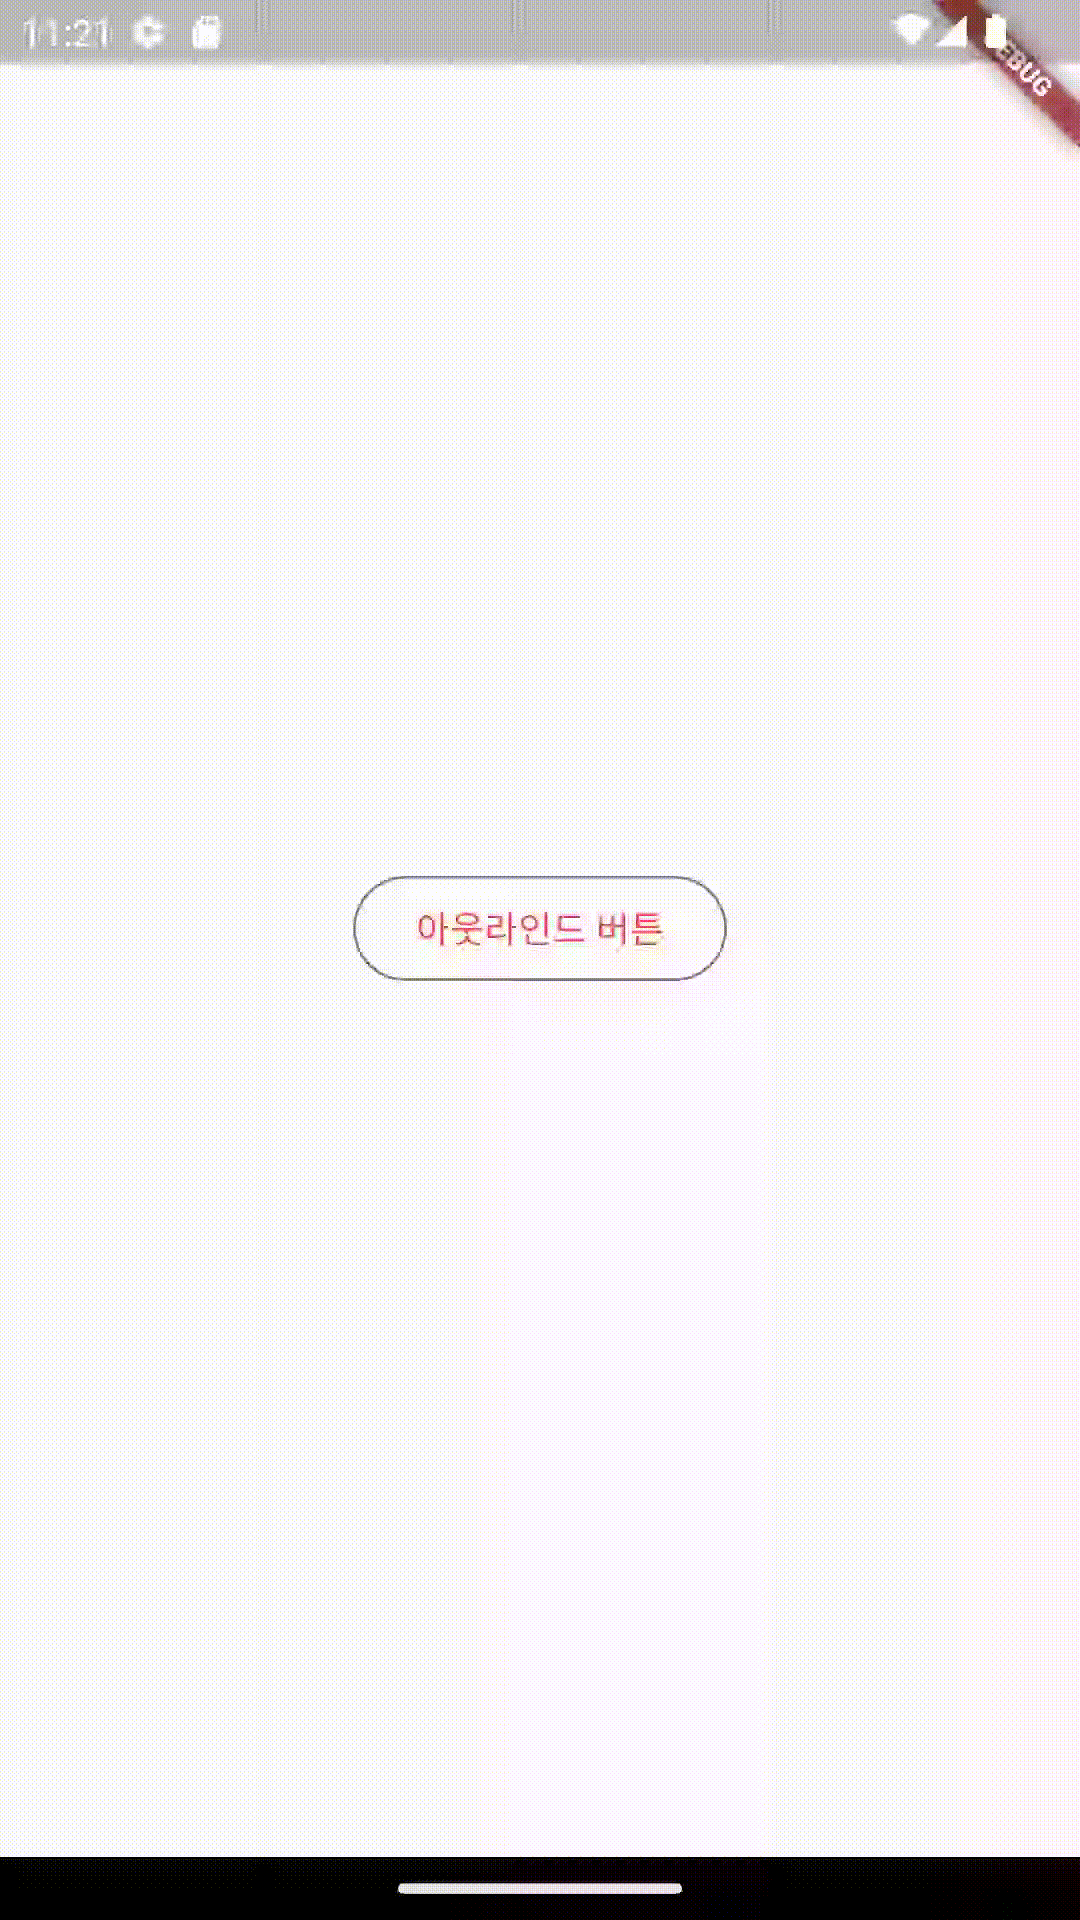
child: OutlinedButton(
onPressed: () {}, // 클릭시 실행
style: OutlinedButton.styleFrom( // 버튼 스타일
foregroundColor: Colors.red,
),
child: Text('아웃라인드 버튼'), // 버튼에 넣을 위젯
),
),
),
);
}
}
import 'package:flutter/material.dart';
void main() {
runApp(MyApp());
}
class MyApp extends StatelessWidget {
@override
Widget build(BuildContext context) {
return MaterialApp(
home: Scaffold(
body: Center(
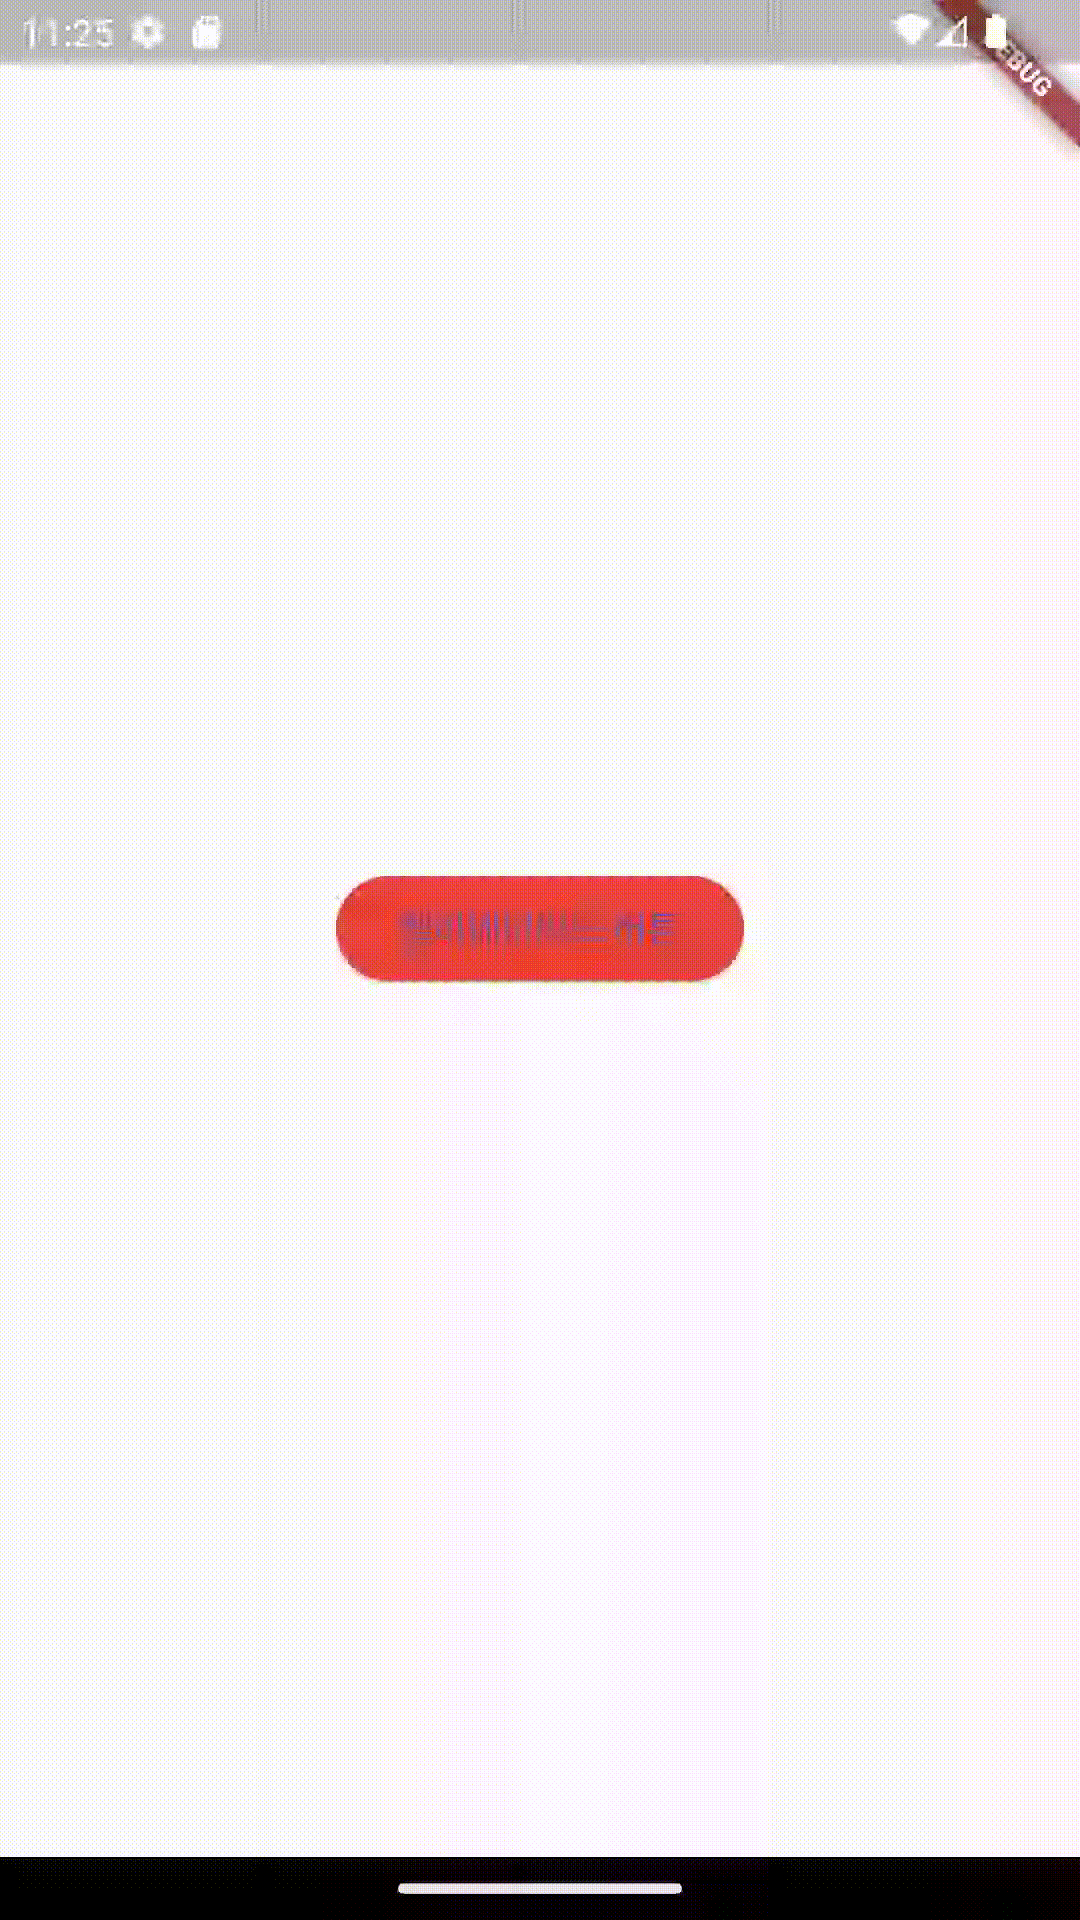
child: ElevatedButton(
onPressed: () {}, // 클릭시 실행
style: ElevatedButton.styleFrom( // 버튼 스타일
backgroundColor: Colors.red,
),
child: Text('엘리베이티드 버튼'), // 버튼에 넣을 위젯
),
),
),
);
}
}
IconButton 위젯
Icons 클래스를 통해 기본 제공 아이콘들을 사용할 수 있다. 제공되는 아이콘 목록은 https://fonts.google.com/icons에서 확인할 수 있다.
import 'package:flutter/material.dart';
void main() {
runApp(MyApp());
}
class MyApp extends StatelessWidget {
@override
Widget build(BuildContext context) {
return MaterialApp(
home: Scaffold(
body: Center(
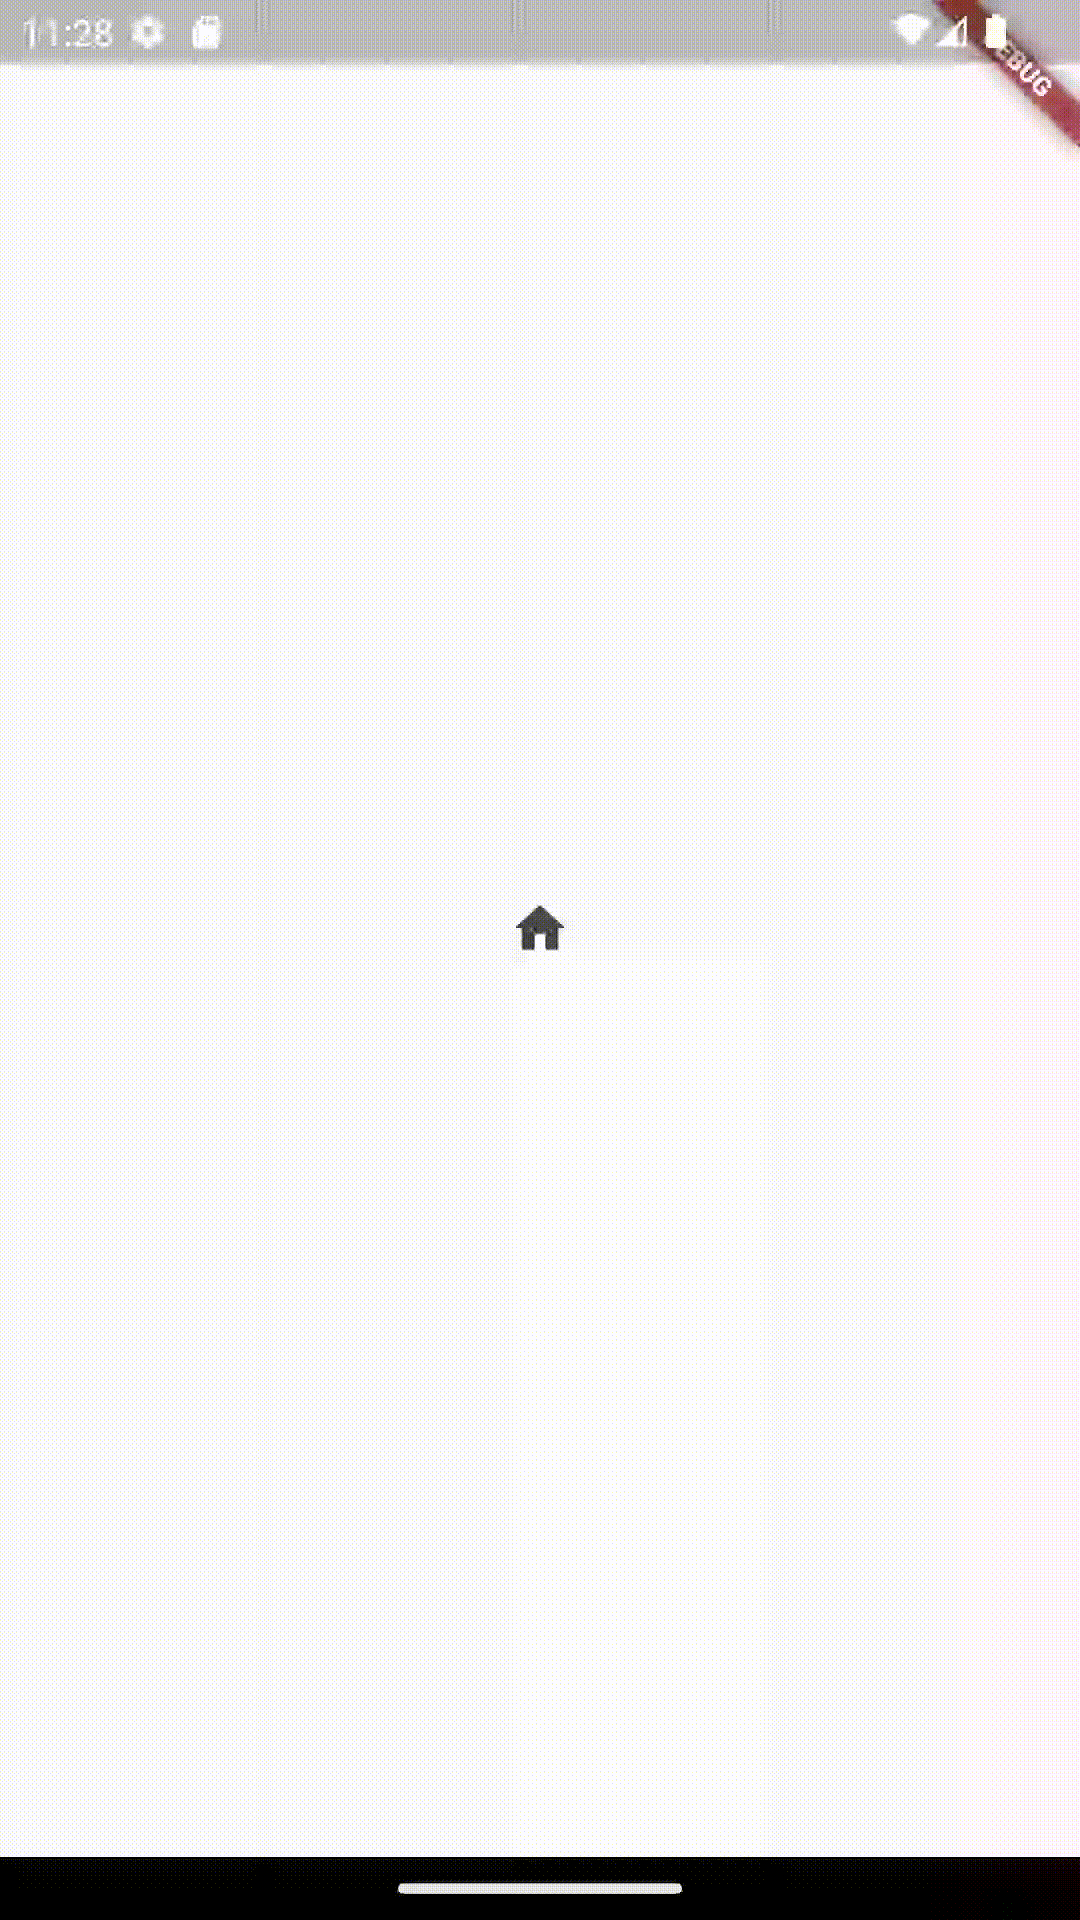
child: IconButton(
onPressed: () {}, // 클릭시 실행
icon: Icon(
Icons.home,
)
),
),
),
);
}
}
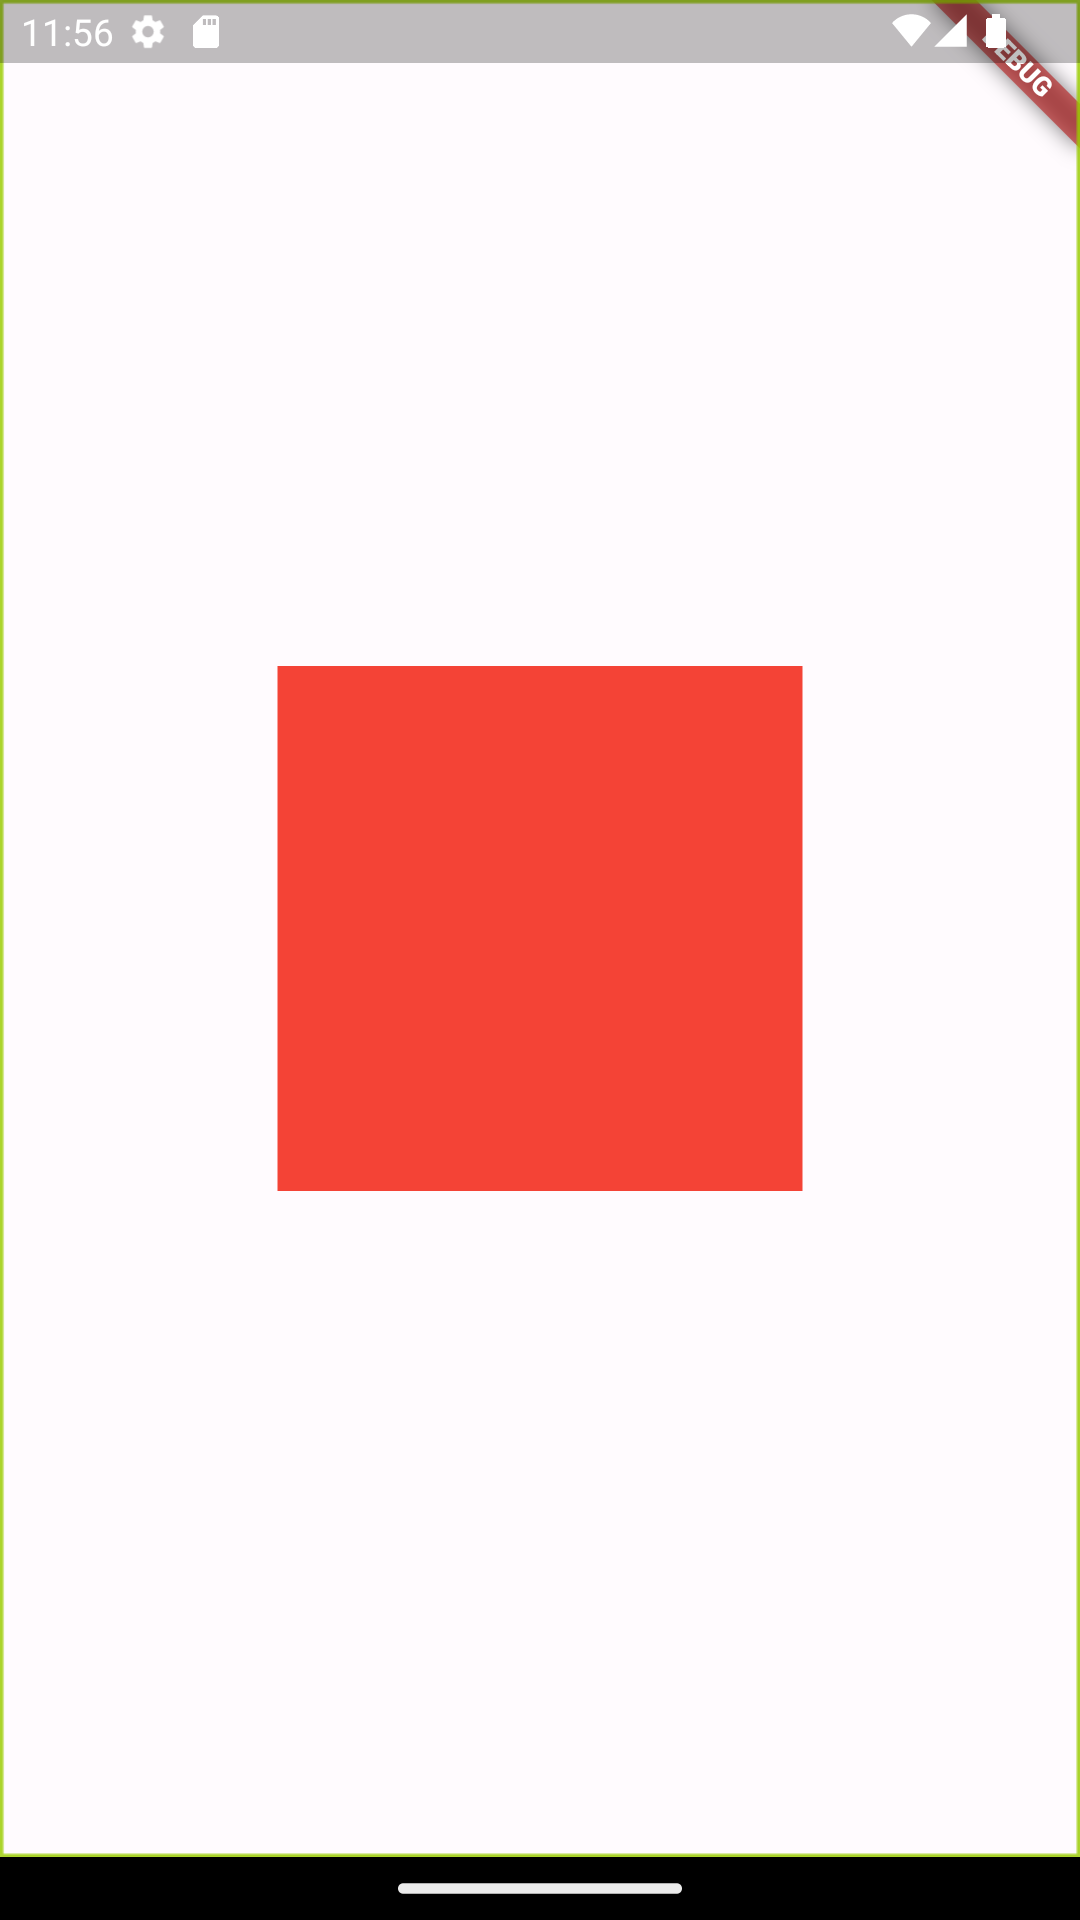
GestureDetector 위젯
import 'package:flutter/material.dart';

void main() {
  runApp(MyApp());
}

class MyApp extends StatelessWidget {
  @override
  Widget build(BuildContext context) {
    return MaterialApp(
      home: Scaffold(
        body: Center(
          child: GestureDetector(
            onTap: () { // 한 번 탭했을 때 실행할 함수
              print('on tap');
            },
            onDoubleTap: () { // 두 번 탭했을 때 실행할 함수
              print('on double tap');
            },
            onLongPress: () {
              print('on long press');
            },
            child: Container( // 제스처를 적용할 위젯
              decoration: BoxDecoration(
                color: Colors.red,
              ),
              width: 100.0,
              height: 100.0,
            ),
          )
        ),
      ),
    );
  }
}
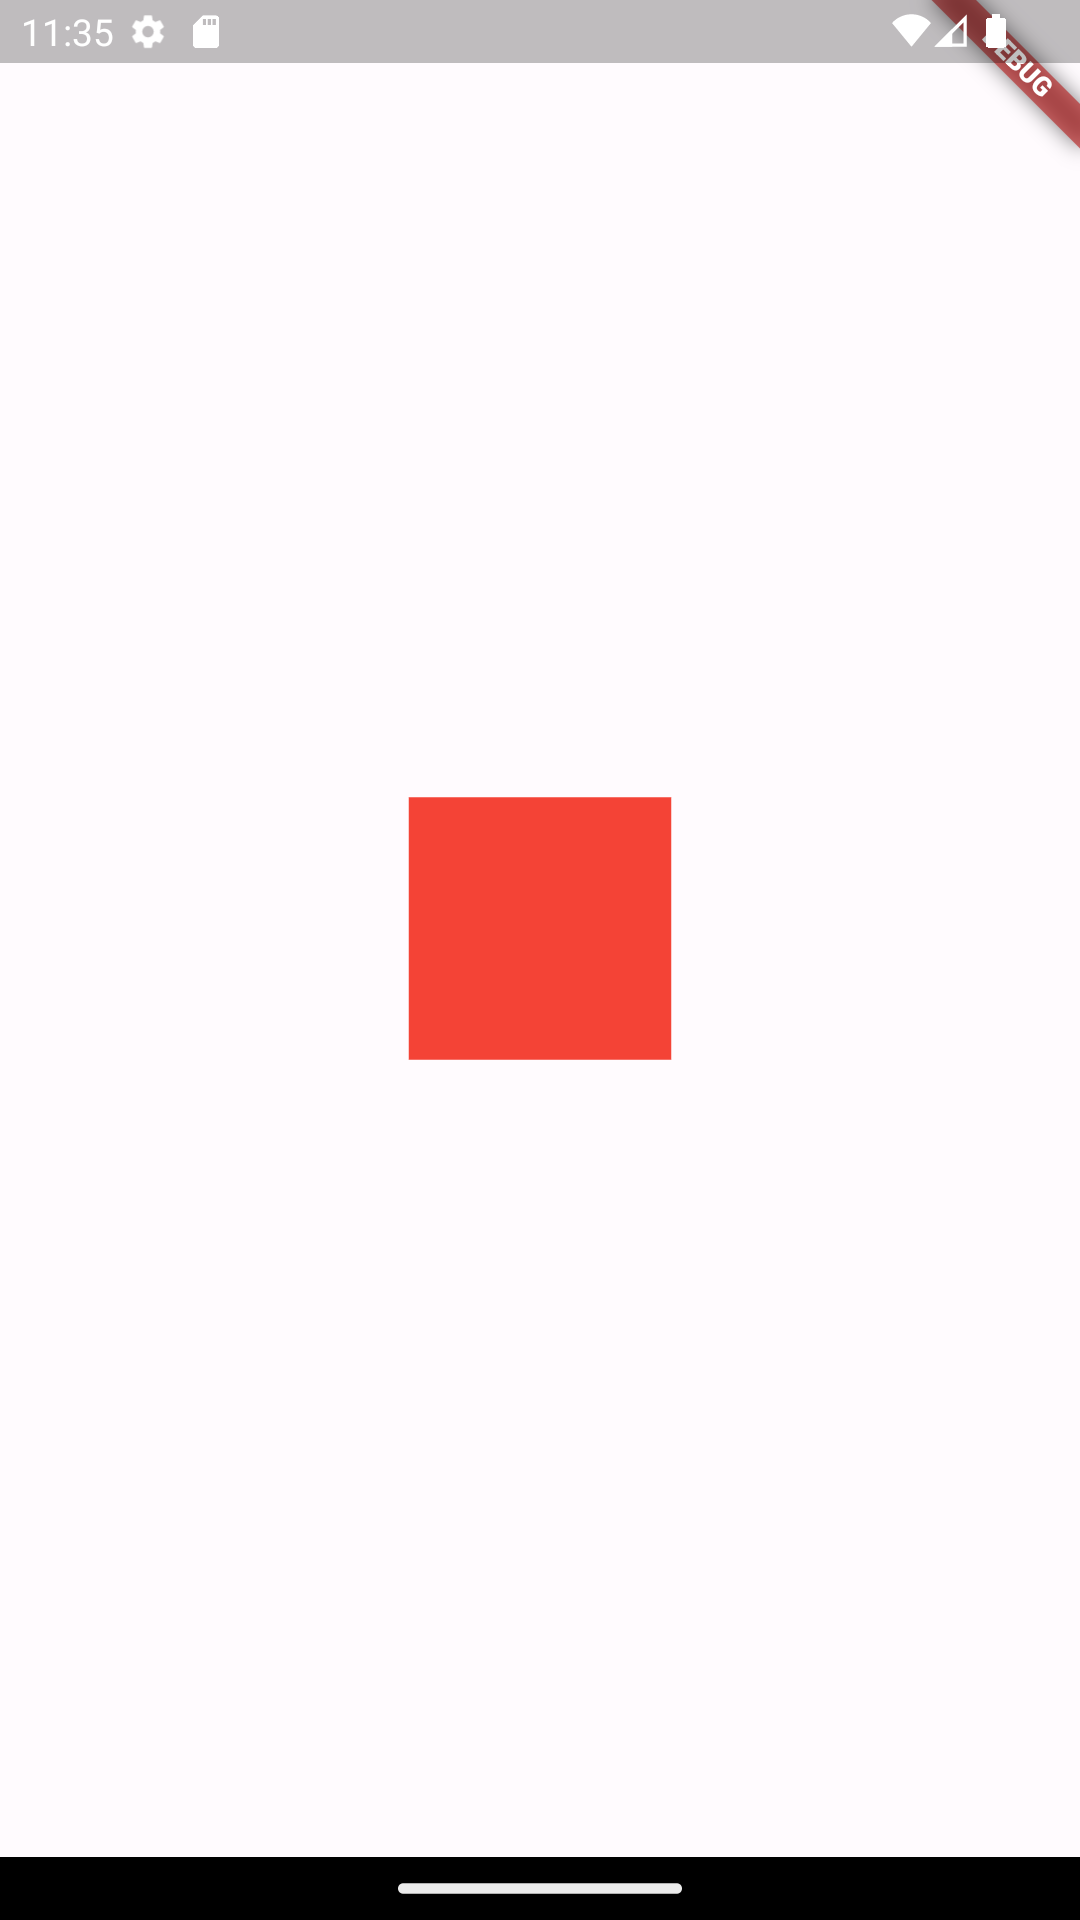
빨간 박스를 탭, 더블탭, 롱프레스 했을때 콘솔에서 아래와 같은 로그를 확인할 수 있다.
I/flutter ( 5420): on tap
I/flutter ( 5420): on double tap
I/flutter ( 5420): on long press
이 외에 onPanStart, onPanUpdate, onPanEnd, onHorizontalDragStart, onHorizontalDragUpdate, onHorizontalDragEnd, onVerticalDragStart, onVerticalDragUpdate, onVerticalDragEnd, onScaleStart, onScaleUpdate, onScaleEnd 등이 있다. https://api.flutter.dev/flutter/widgets/GestureDetector-class.html에서 모두 확인 가능하다.
FloatingActionButton 위젯
import 'package:flutter/material.dart';
void main() {
runApp(FloatingActionButtonExample());
}
class FloatingActionButtonExample extends StatelessWidget {
@override
Widget build(BuildContext context) {
return MaterialApp(
home: Scaffold(
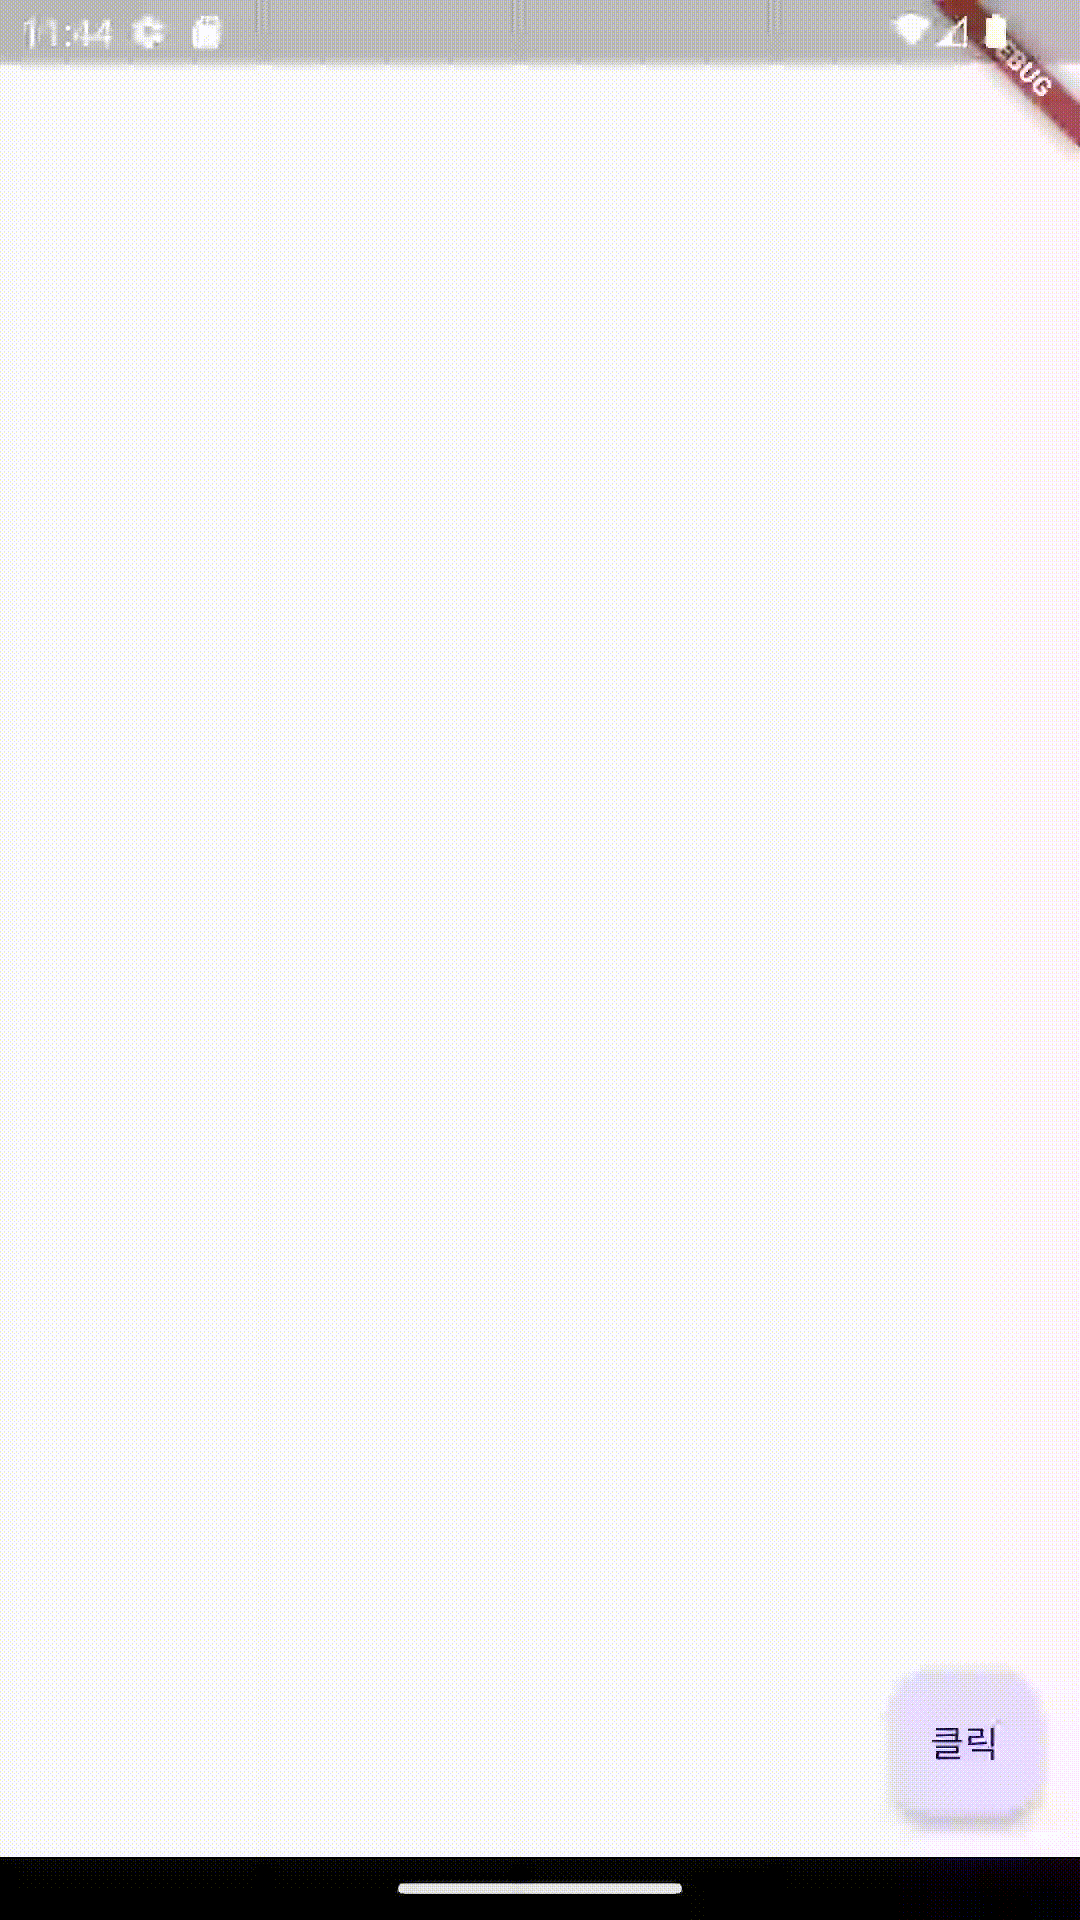
floatingActionButton: FloatingActionButton(
onPressed: () {}, // 클릭했을 때 실행할 함수
child: Text('클릭'),
),
body: Container(),
),
);
}
}
디자인 관련 위젯
Container 위젯
다른 위젯을 담는 용도, 위젯의 너비와 높이를 지정하거나 배경이나 테두리를 추가할때 많이 사용한다.
import 'package:flutter/material.dart';
void main() {
runApp(MyApp());
}
class MyApp extends StatelessWidget {
@override
Widget build(BuildContext context) {
return MaterialApp(
home: Scaffold(
body: Center(
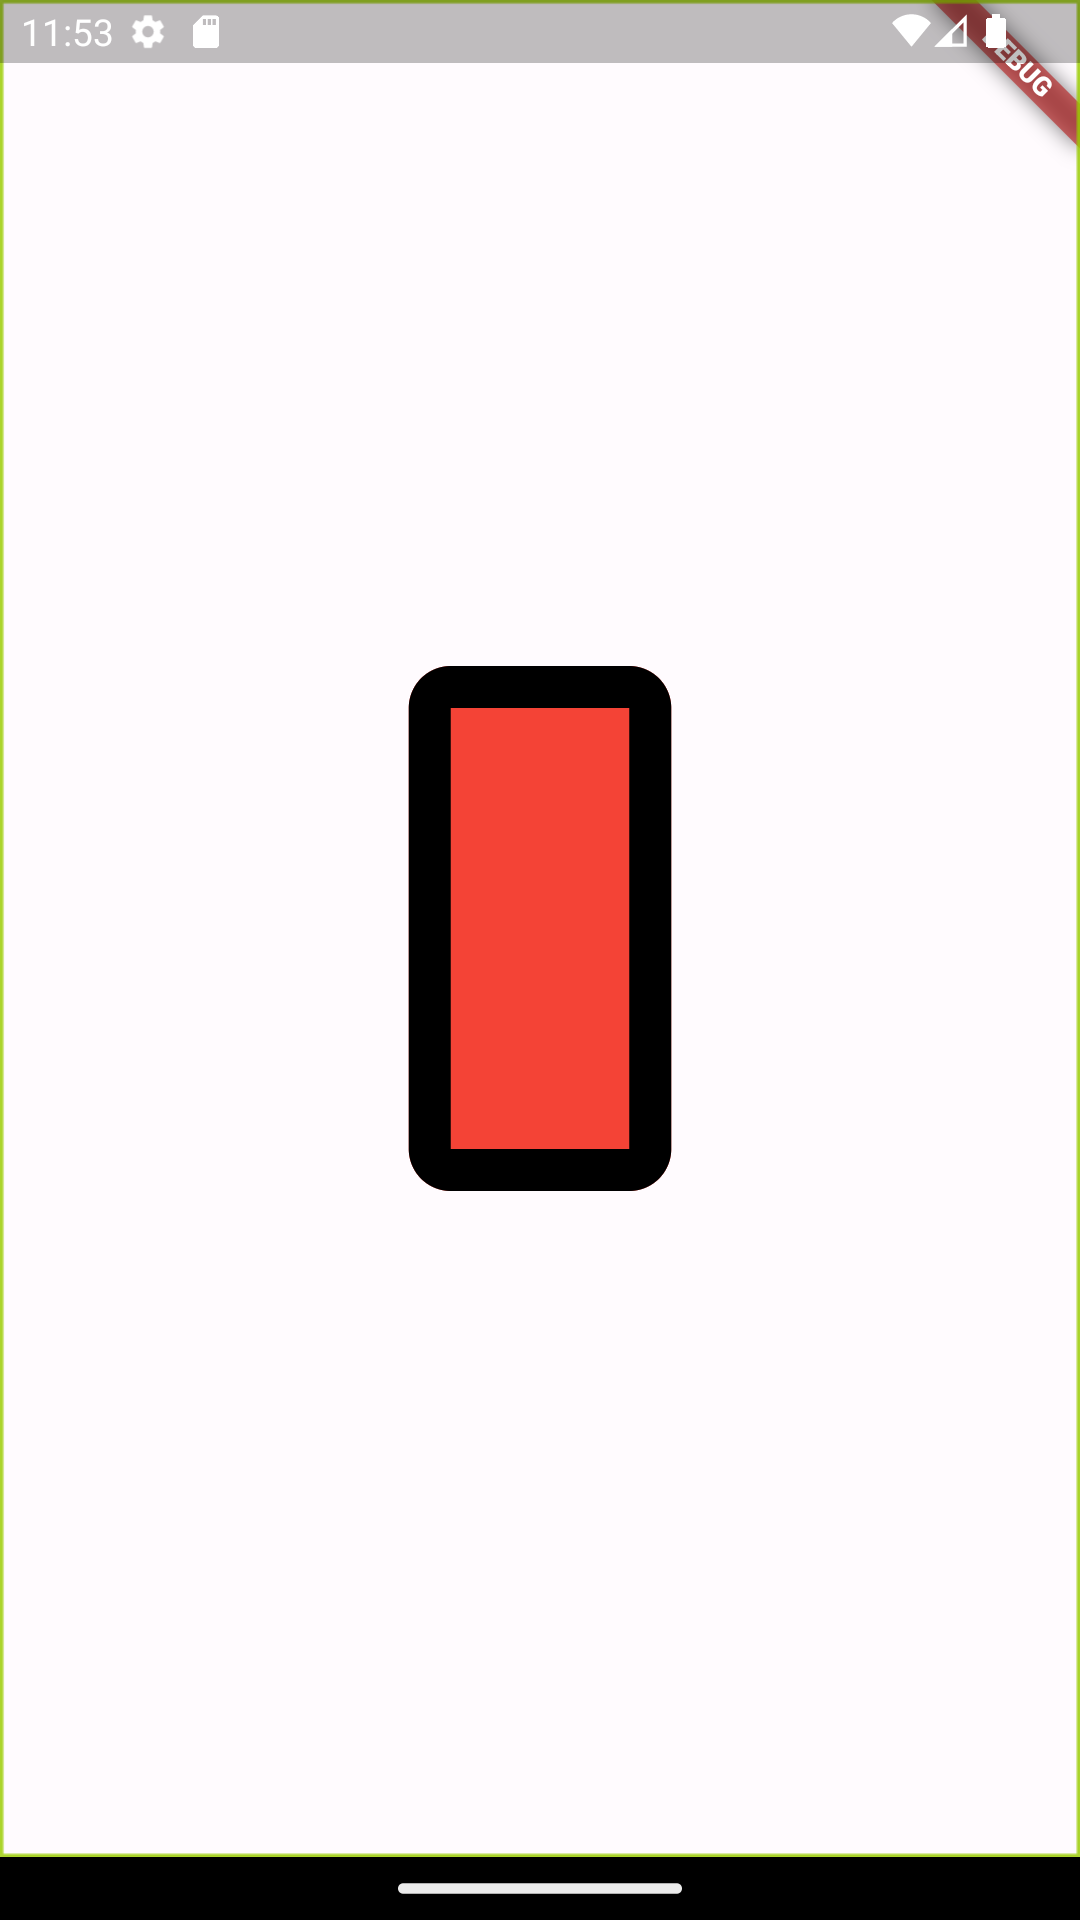
child: Container(
decoration: BoxDecoration(
color: Colors.red, // 배경색 적용
border: Border.all(
// 테두리 적용
width: 16.0, // 테두리 굵기
color: Colors.black, // 테두리 색상
),
borderRadius: BorderRadius.circular(
16.0,
),
),
height: 200.0, // 높이
width: 100.0, // 너비
),
),
),
);
}
}
SizedBox 위젯
import 'package:flutter/material.dart';

void main() {
  runApp(MyApp());
}

class MyApp extends StatelessWidget {
  @override
  Widget build(BuildContext context) {
    return MaterialApp(
      home: Scaffold(
        body: Center(
          child: SizedBox(
            height: 200.0, // 높이 지정
            width: 200.0, // 너비 지정
            child: Container(
              // 크기 확인 용도로 Container 추가
              color: Colors.red,
            ),
          ),
        ),
      ),
    );
  }
}
Padding 위젯
import 'package:flutter/material.dart';

void main() {
  runApp(MyApp());
}

class MyApp extends StatelessWidget {
  @override
  Widget build(BuildContext context) {
    return MaterialApp(
      home: Scaffold(
        body: Center(
          child: Container(
            color: Colors.blue,
            child: Padding(
              padding: EdgeInsets.all(
                // 상하, 좌우로 모두 16픽셀만큼 패딩 적용
                16.0,
              ),
              child: Container(
                color: Colors.red,
                width: 50.0,
                height: 50.0,
              ),
            ),
          ),
        ),
      ),
    );
  }
}
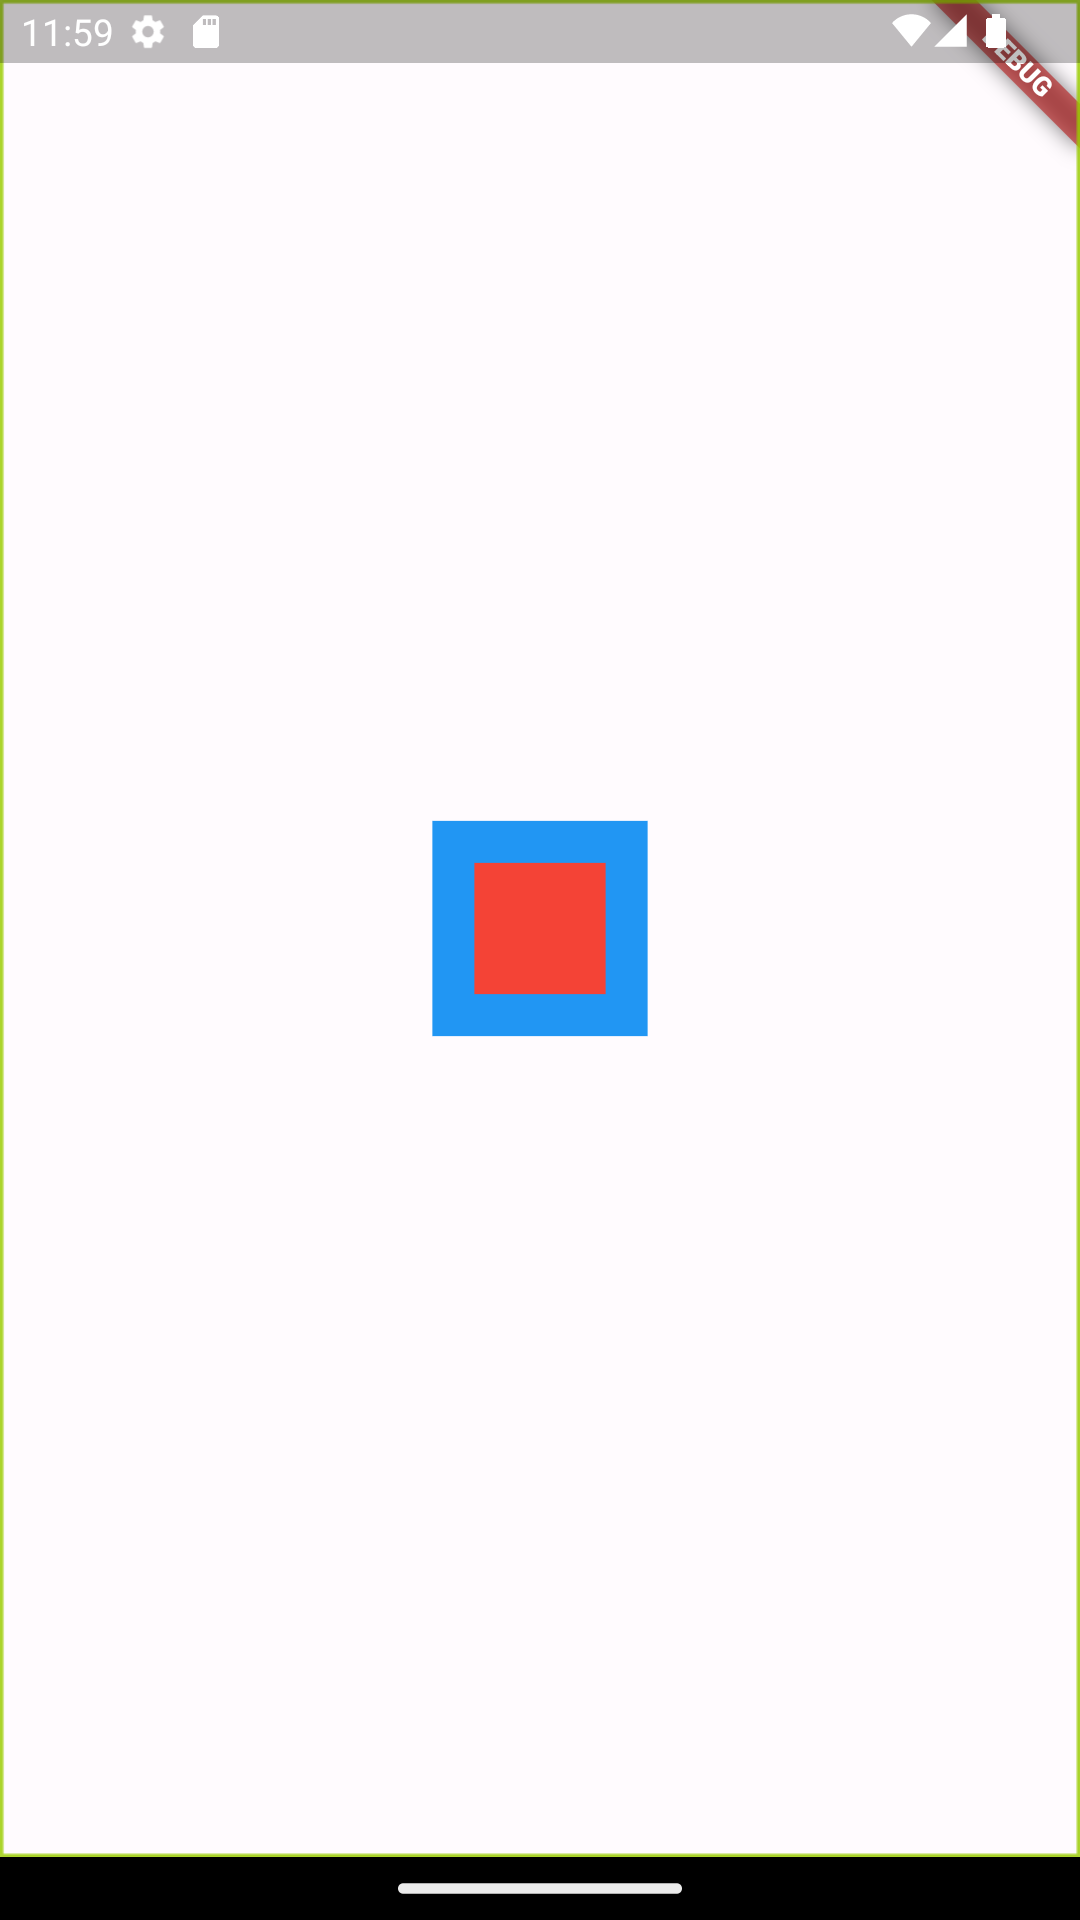
패딩은 적용된 위젯이 차지하는 크기 내부에서 간격이 추가된다. 위젯의 바깥에 간격을 추가해주는 마진margin이라는 기능도 있다. 따로 마진 위젯이 존재하지는 않고 Container 위젯에 추가할 수 있다.
import 'package:flutter/material.dart';

void main() {
  runApp(MyApp());
}

class MyApp extends StatelessWidget {
  @override
  Widget build(BuildContext context) {
    return MaterialApp(
      home: Scaffold(
        body: Center(
          // 최상위 검정 컨테이너 (margin이 적용되는 대상)
          child: Container(
            color: Colors.black,
            child: Container(
                // 중간 파란 컨테이너
                color: Colors.blue,
                margin: EdgeInsets.all(16.0), // 마진 적용 위치
                child: Padding(
                  // 패딩 적용
                  padding: EdgeInsets.all(16.0),
                  // 패딩이 적용된 빨간 컨테이너
                  child: Container(
                    color: Colors.red,
                    width: 50,
                    height: 50,
                  ),
                )),
          ),
        ),
      ),
    );
  }
}
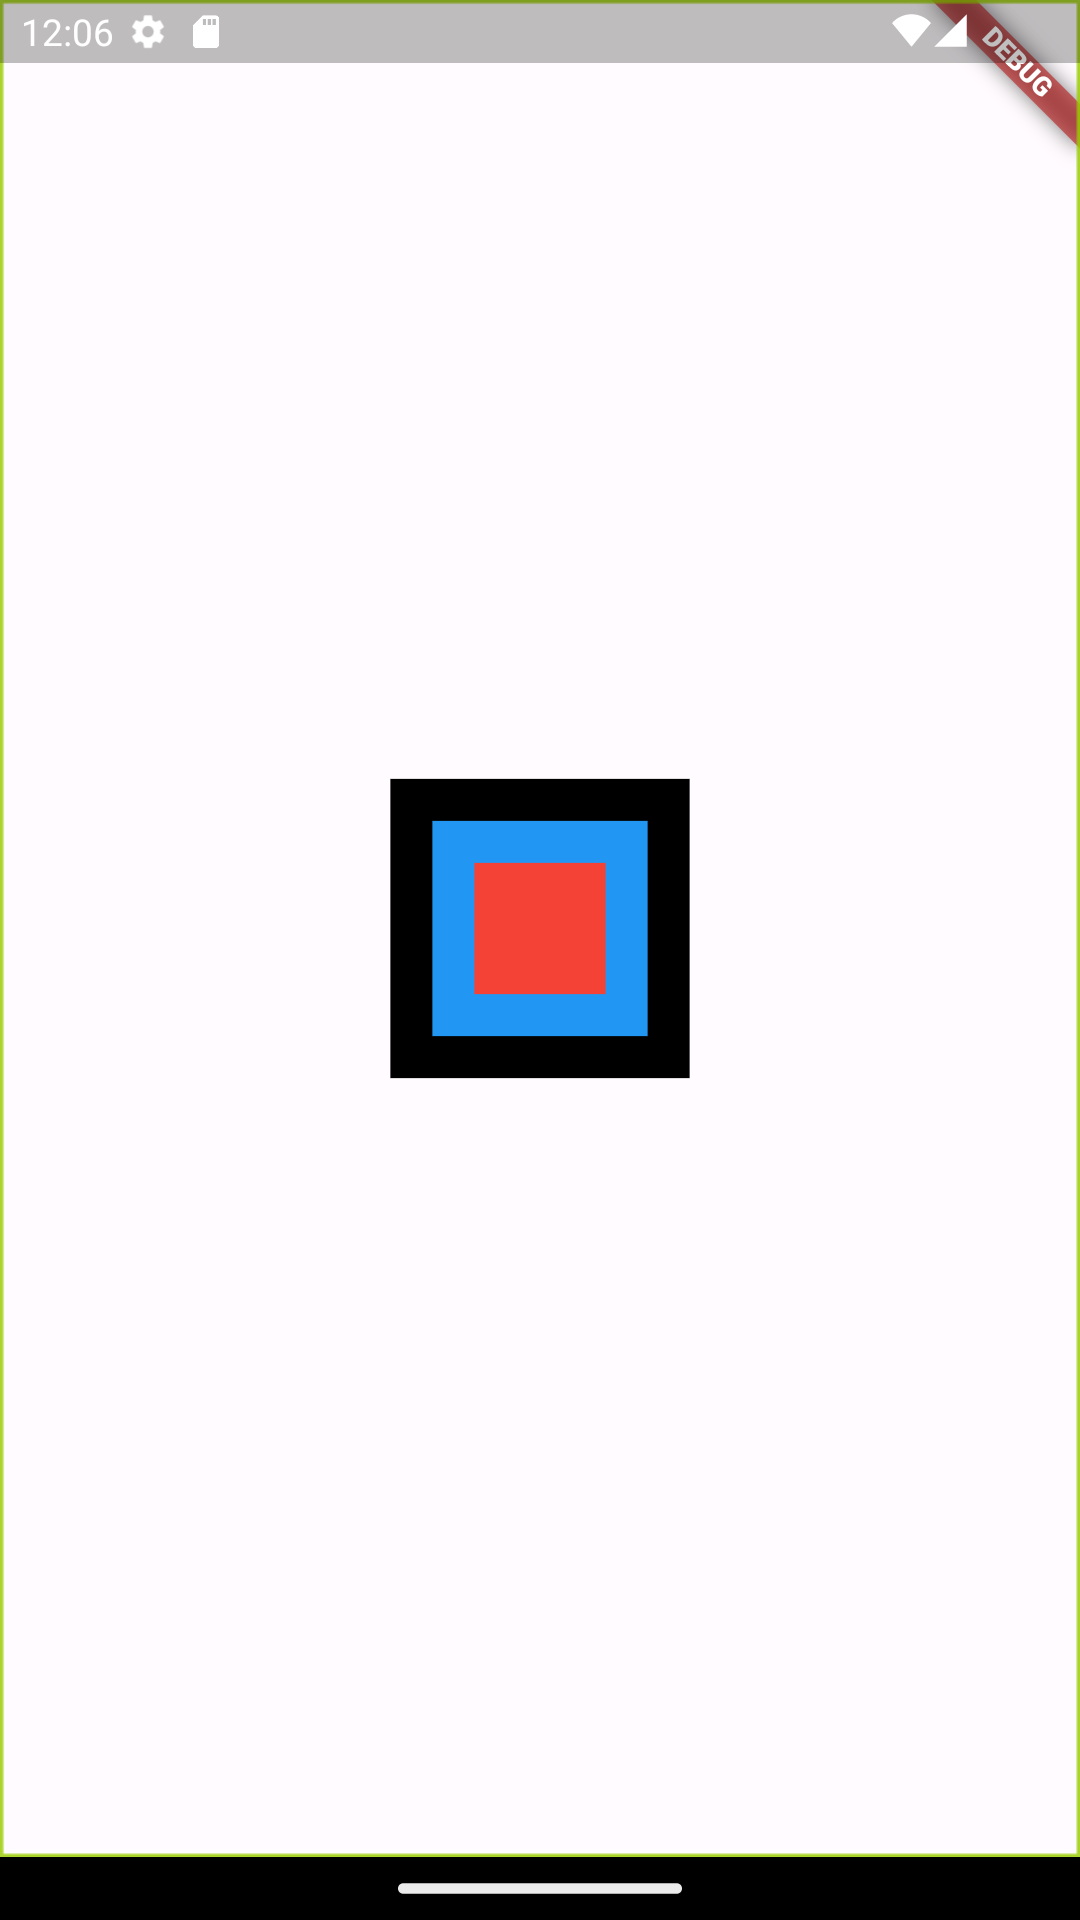
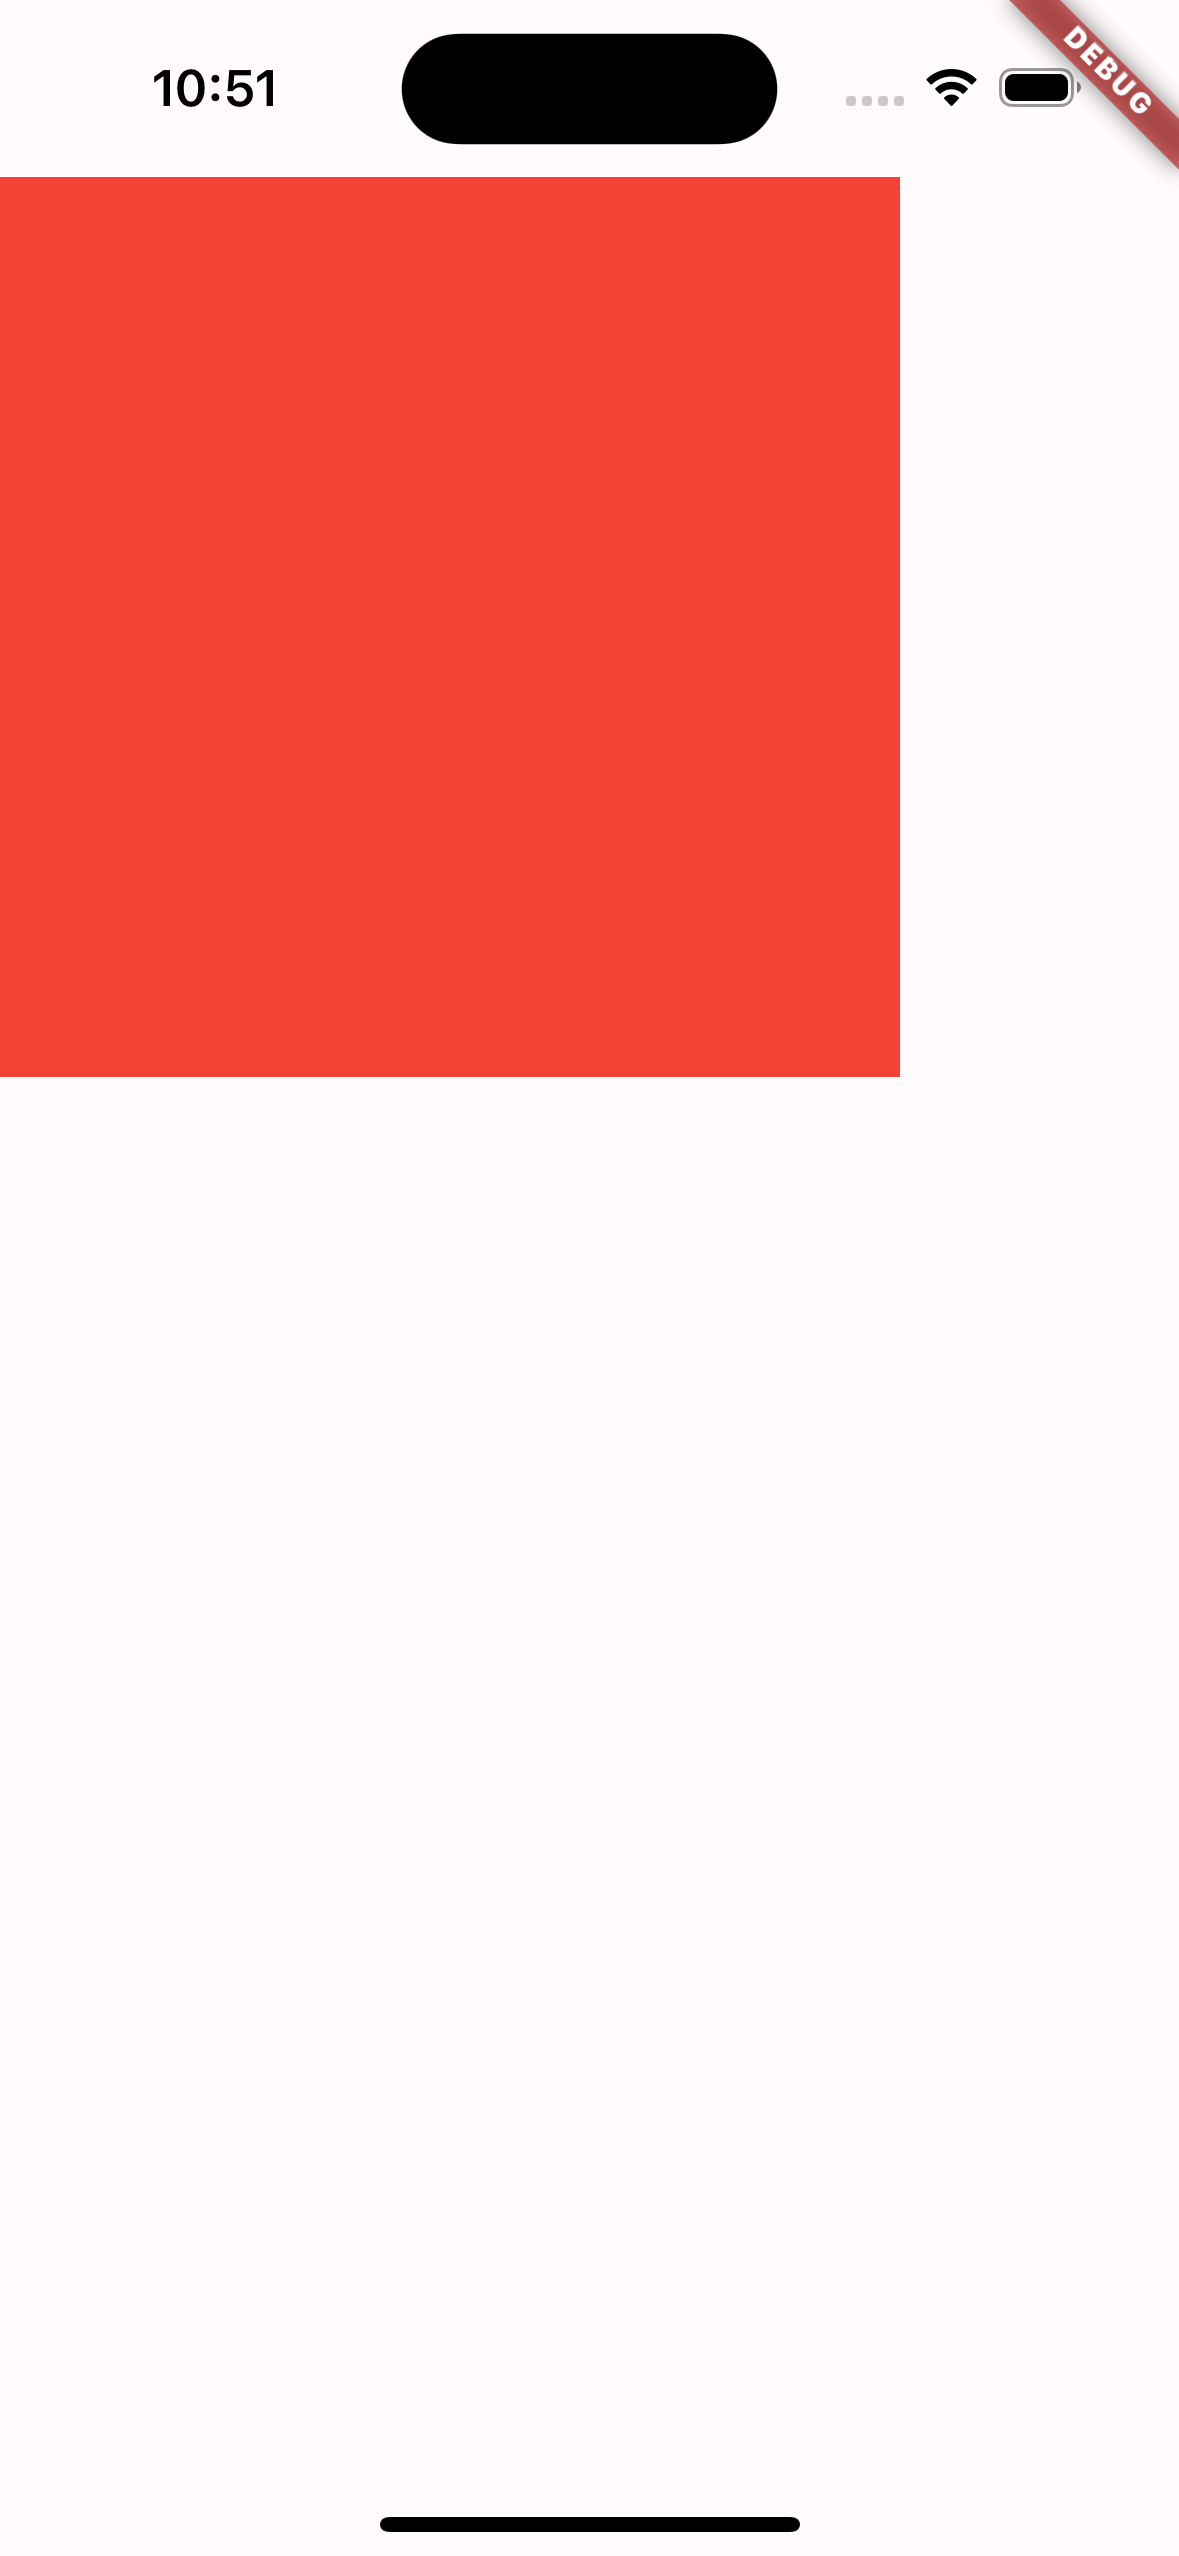
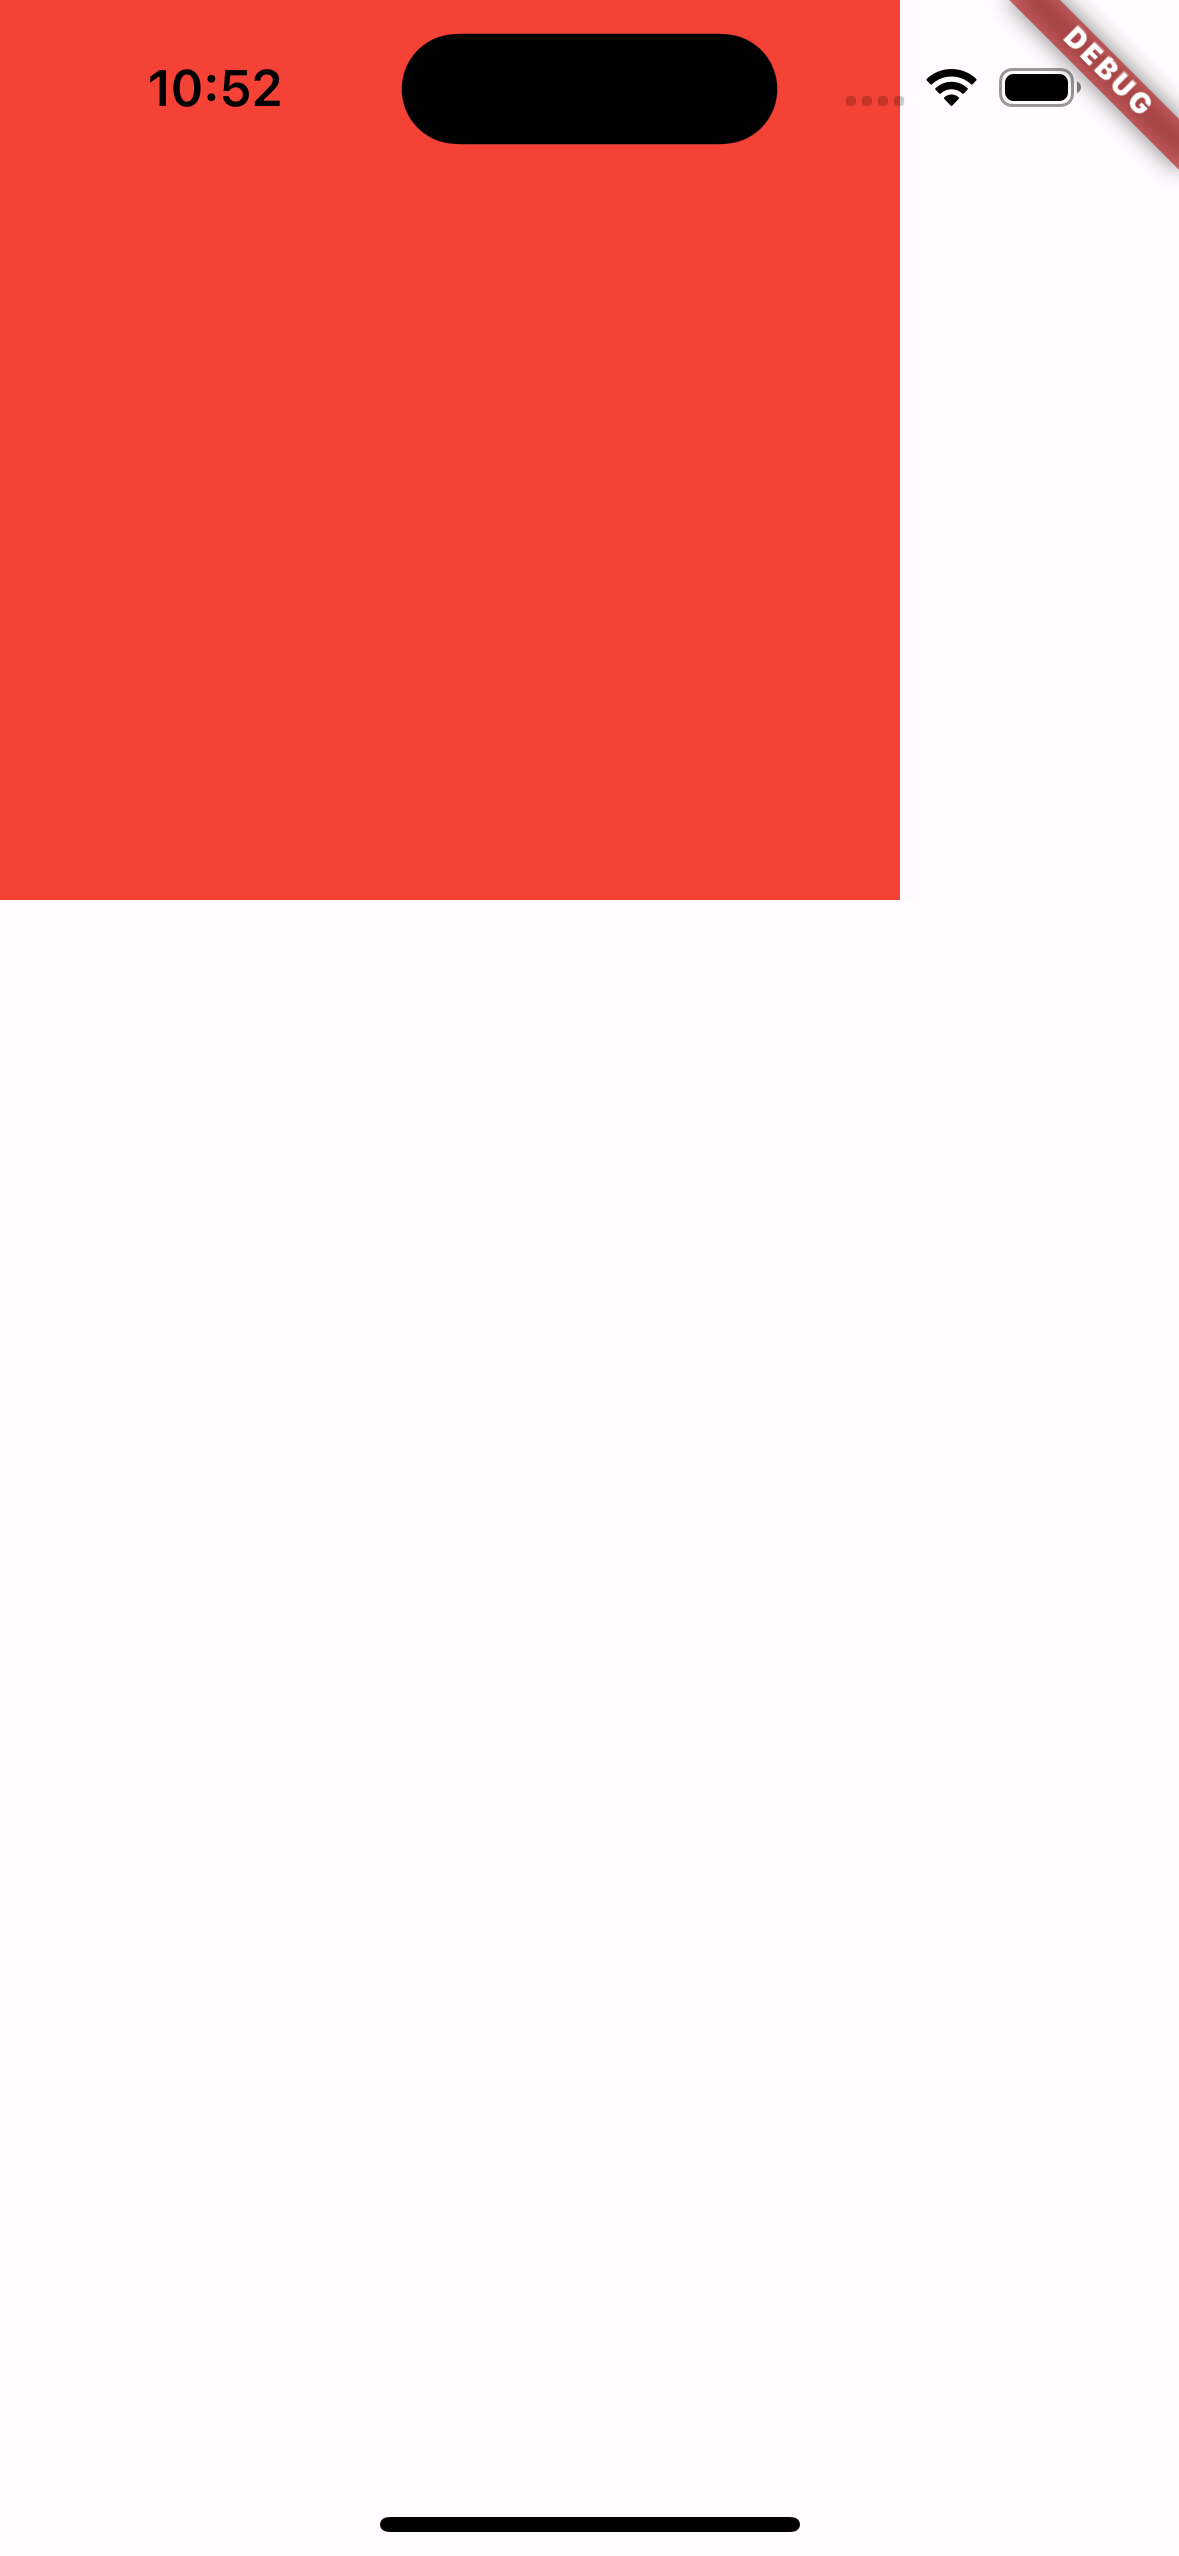
👩🏻💻 바로 위 예제와 비교해보면 쉽게 마진의 역할을 이해할 수 있다. 검정색 컨테이너가 마진이 적용된 부분이다.
SafeArea
SafeArea 위젯을 사용하면 따로 기기별로 예외 처리를 하지 않고도 안전한(Safe) 화면에서만 위젯을 그릴 수 있다.
import 'package:flutter/material.dart';

void main() {
  runApp(MyApp());
}

class MyApp extends StatelessWidget {
  @override
  Widget build(BuildContext context) {
    return MaterialApp(
      home: Scaffold(
        body: SafeArea(
          top: true, // 적용
          bottom: true,
          left: true,
          child: Container(
            color: Colors.red,
            height: 300.0,
            width: 300.0,
          ),
        ),
      ),
    );
  }
}
import 'package:flutter/material.dart';

void main() {
  runApp(MyApp());
}

class MyApp extends StatelessWidget {
  @override
  Widget build(BuildContext context) {
    return MaterialApp(
      home: Scaffold(
        body: SafeArea(
          top: true, // 미적용
          bottom: true,
          left: true,
          child: Container(
            color: Colors.red,
            height: 300.0,
            width: 300.0,
          ),
        ),
      ),
    );
  }
}
배치 관련 위젯
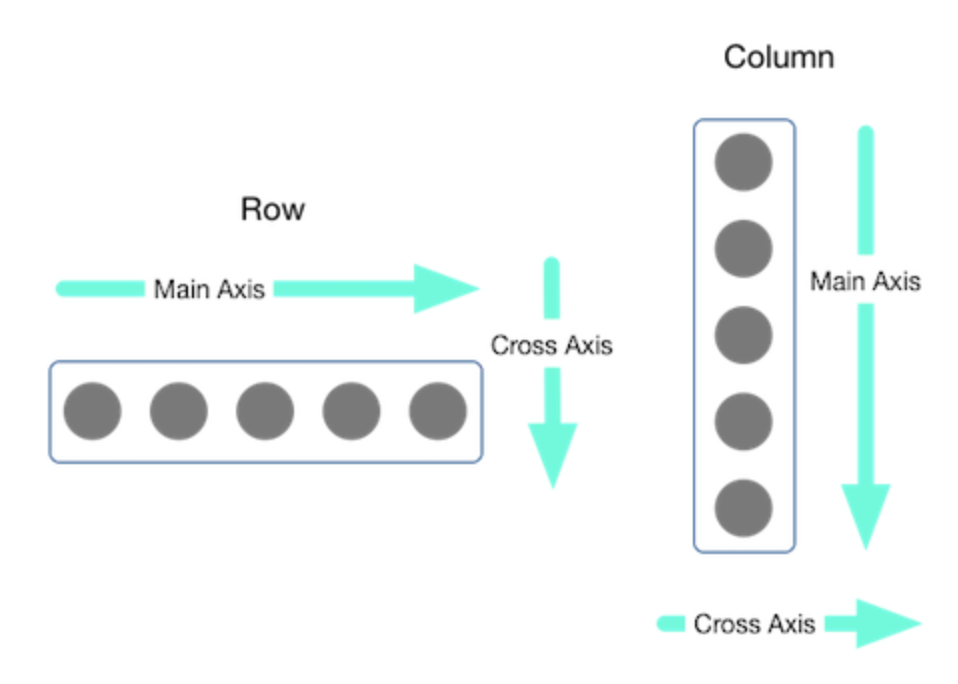
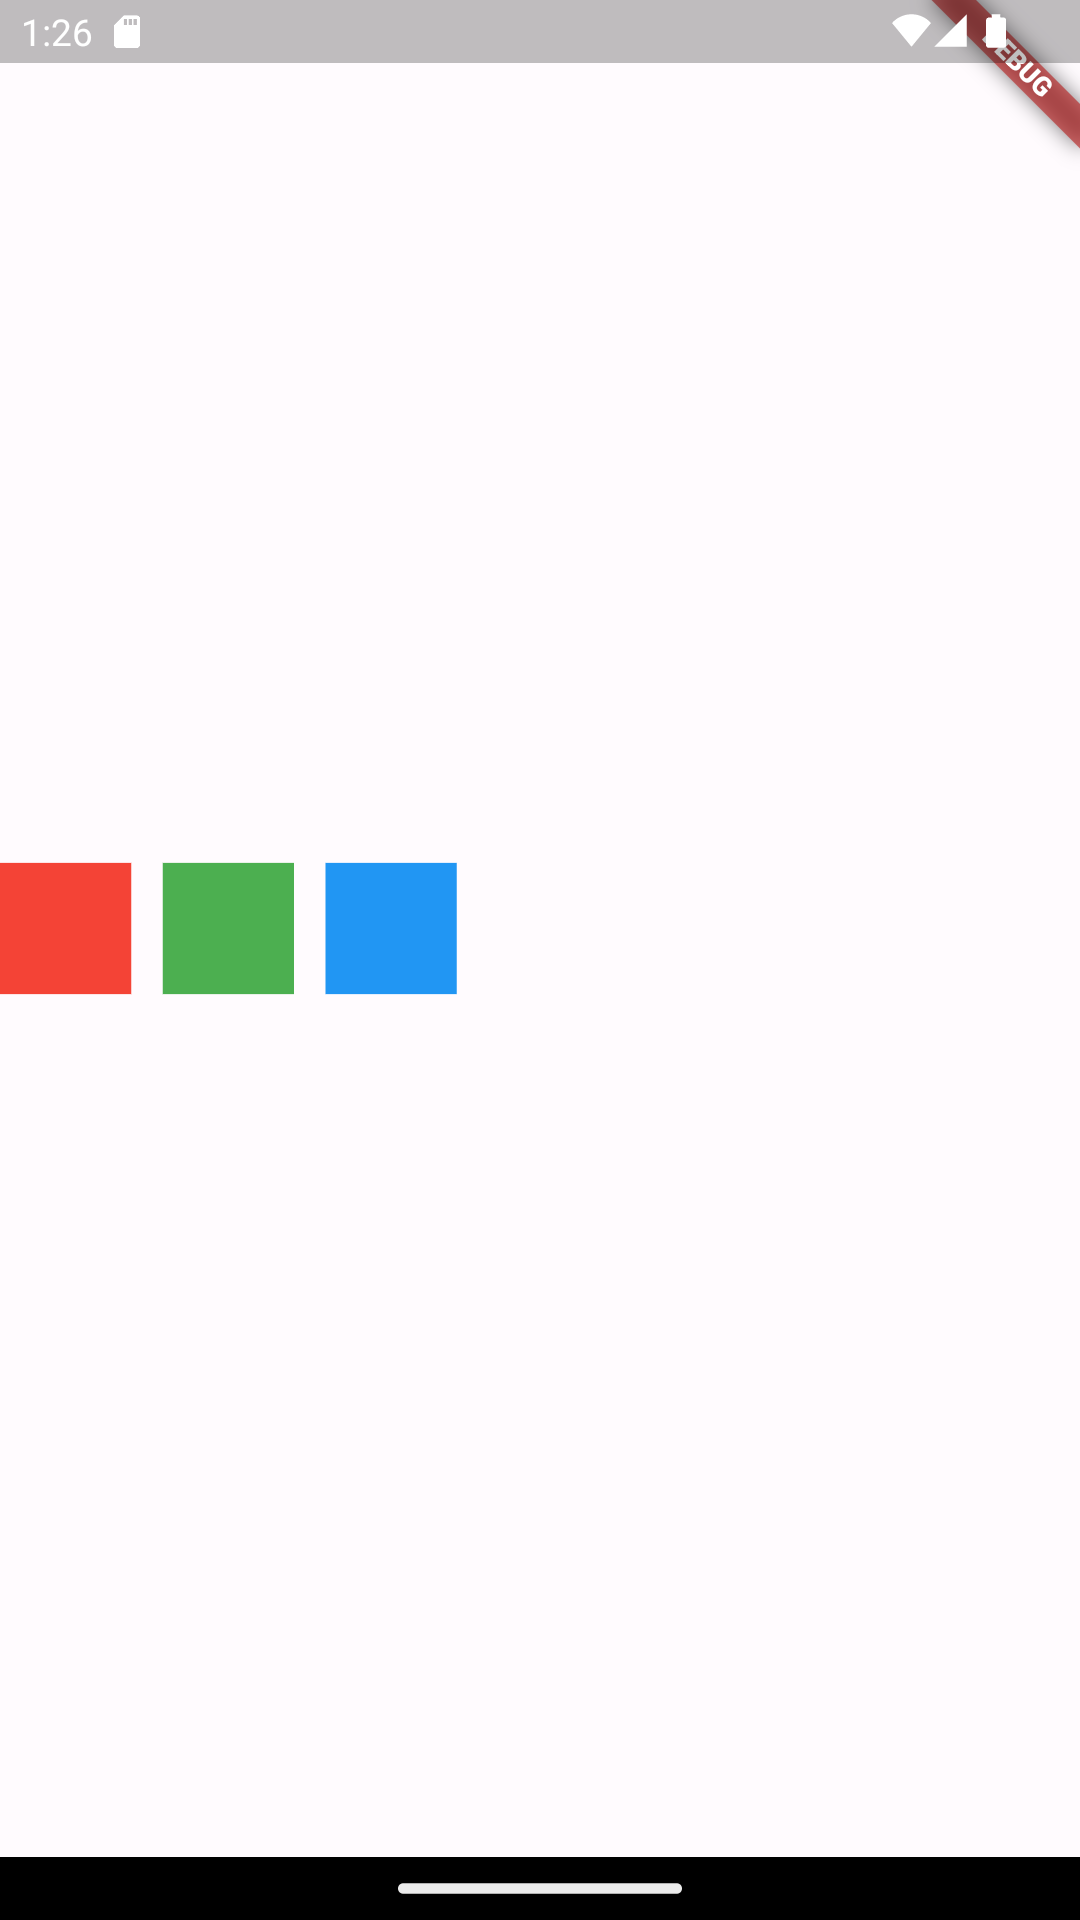
Row 위젯
가로로 위젯을 배치하는 데 사용된다. 여러 개의 child 위젯을 입력받는 children 매개변수를 노출한다. 주축main axis과 반대축cross axis라는 개념이 있다. 아래 그림에서 회색 동그라미들이 children에 해당한다.
import 'package:flutter/material.dart';

void main() {
  runApp(RowWidgetExample());
}

class RowWidgetExample extends StatelessWidget {
  @override
  Widget build(BuildContext context) {
    return MaterialApp(
      home: Scaffold(
        body: SizedBox(
          height: double.infinity,
          child: Row(
            mainAxisAlignment: MainAxisAlignment.start,
            crossAxisAlignment: CrossAxisAlignment.center,
            children: [
              Container(
                height: 50.0,
                width: 50.0,
                color: Colors.red,
              ),
              const SizedBox(width: 12.0),
              Container(
                height: 50.0,
                width: 50.0,
                color: Colors.green,
              ),
              const SizedBox(width: 12.0),
              Container(
                height: 50.0,
                width: 50.0,
                color: Colors.blue,
              )
            ],
          ),
        ),
      ),
    );
  }
}
Column 위젯
import 'package:flutter/material.dart';

void main() {
  runApp(ColumnWidgetExample());
}

class ColumnWidgetExample extends StatelessWidget {
  @override
  Widget build(BuildContext context) {
    return MaterialApp(
      home: Scaffold(
        body: SizedBox(
          width: double.infinity,
          child: Column(
            mainAxisAlignment: MainAxisAlignment.start,
            crossAxisAlignment: CrossAxisAlignment.center,
            children: [
              Container(
                height: 50.0,
                width: 50.0,
                color: Colors.red,
              ),
              const SizedBox(width: 12.0),
              Container(
                height: 50.0,
                width: 50.0,
                color: Colors.green,
              ),
              const SizedBox(width: 12.0),
              Container(
                height: 50.0,
                width: 50.0,
                color: Colors.blue,
              ),
            ],
          ),
        ),
      ),
    );
  }
}
Flexible 위젯
Row나 Column에서 사용하는 위젯이다. Flexible에 제공된 child가 크기를 최소한으로 차지하게 할 수 있다.
import 'package:flutter/material.dart';

void main() {
  runApp(ColumnWidgetExample());
}

class ColumnWidgetExample extends StatelessWidget {
  @override
  Widget build(BuildContext context) {
    return MaterialApp(
      home: Scaffold(
        body: SizedBox(
          width: double.infinity,
          child: Column(
            children: [
              Flexible(
                flex: 1,
                child: Container(
                  color: Colors.blue,
                ),
              ),
              Flexible(
                flex: 1,
                child: Container(
                  color: Colors.red,
                ),
              )
            ],
          ),
        ),
      ),
    );
  }
}
Expanded 위젯
Flexible 위젯을 상속하는 위젯. 남아 있는 공간을 최대한으로 차지한다. Flexible 위젯과 다르게 남는 공간을 최대한으로 차지한다.
import 'package:flutter/material.dart';

void main() {
  runApp(ColumnWidgetExample());
}

class ColumnWidgetExample extends StatelessWidget {
  @override
  Widget build(BuildContext context) {
    return MaterialApp(
      home: Scaffold(
        body: SizedBox(
          width: double.infinity,
          child: Column(
            children: [
              Expanded(
                flex: 1,
                child: Container(
                  color: Colors.blue,
                ),
              ),
              Expanded(
                flex: 1,
                child: Container(
                  color: Colors.red,
                ),
              )
            ],
          ),
        ),
      ),
    );
  }
}
Expanded 위젯이 두 개이기 때문에 각 위젯이 남는 공간을 똑같이 나눠서 차지한다.
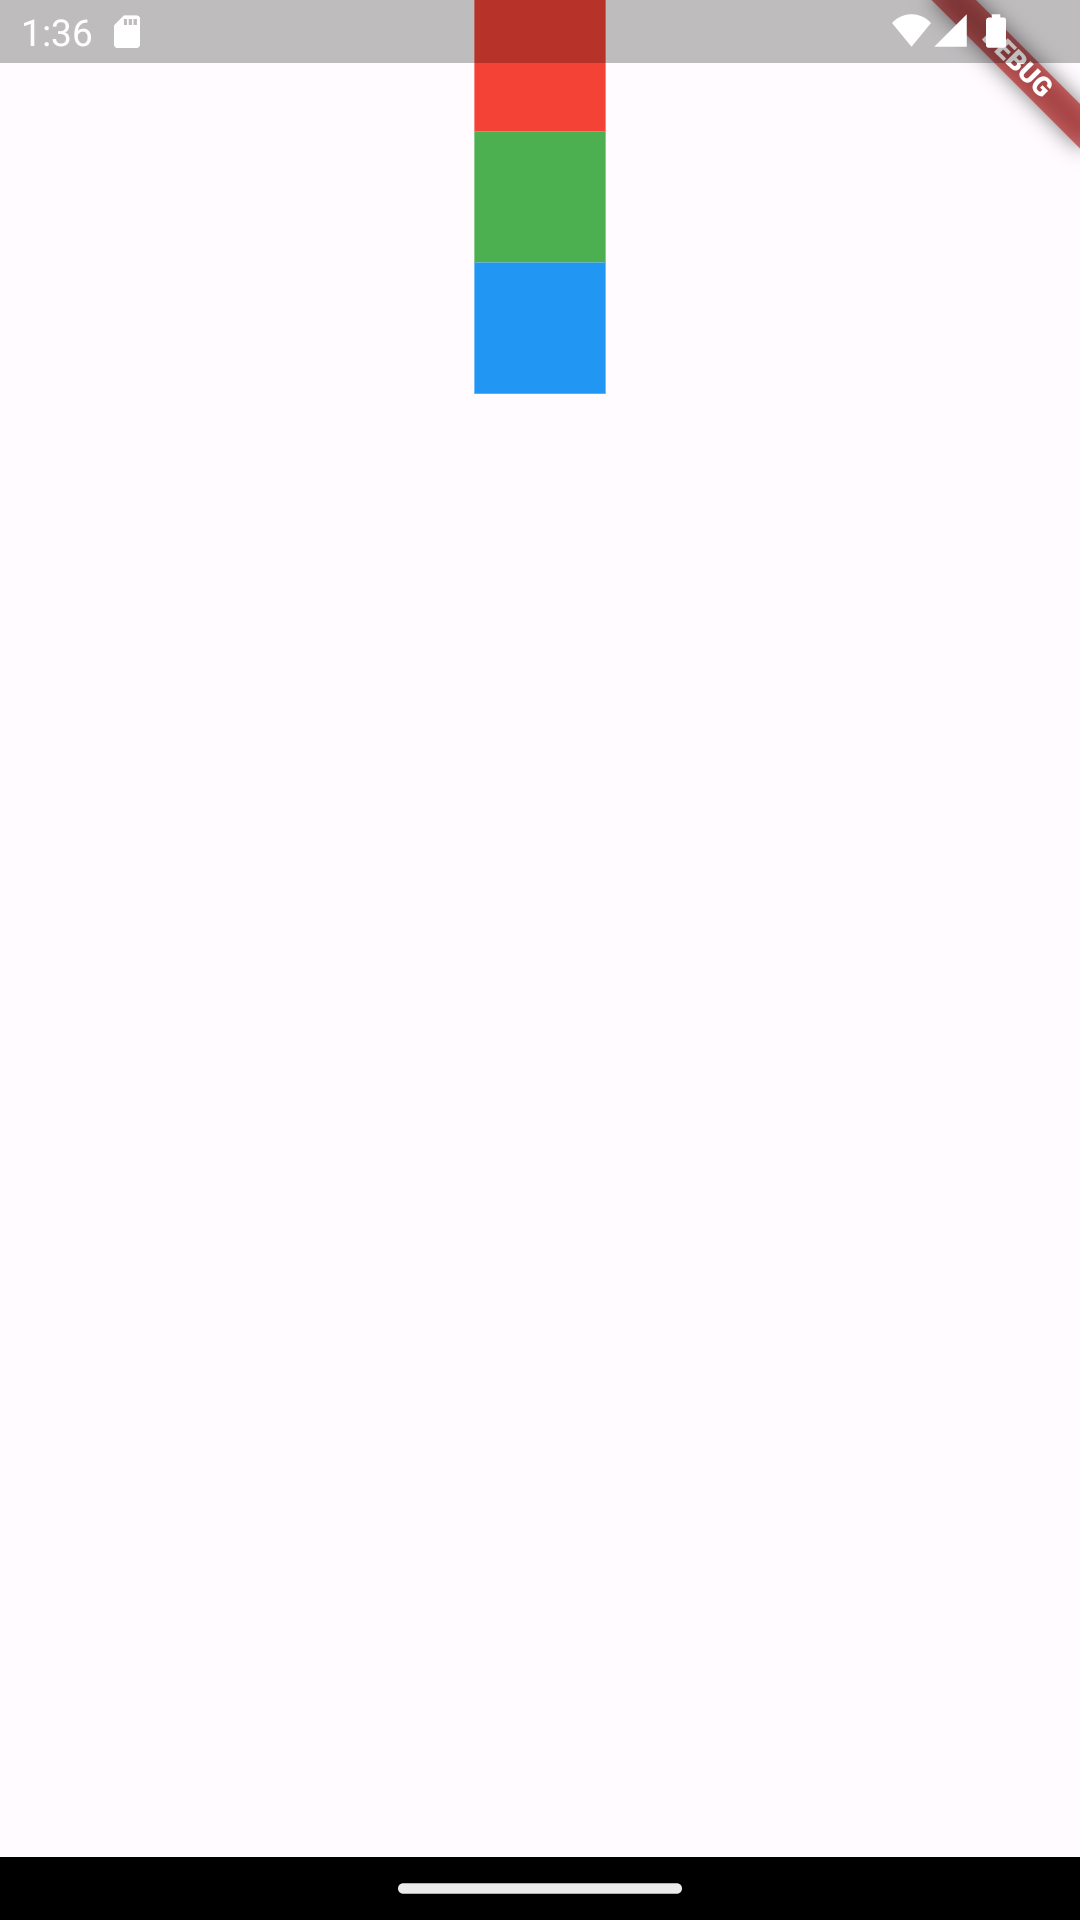
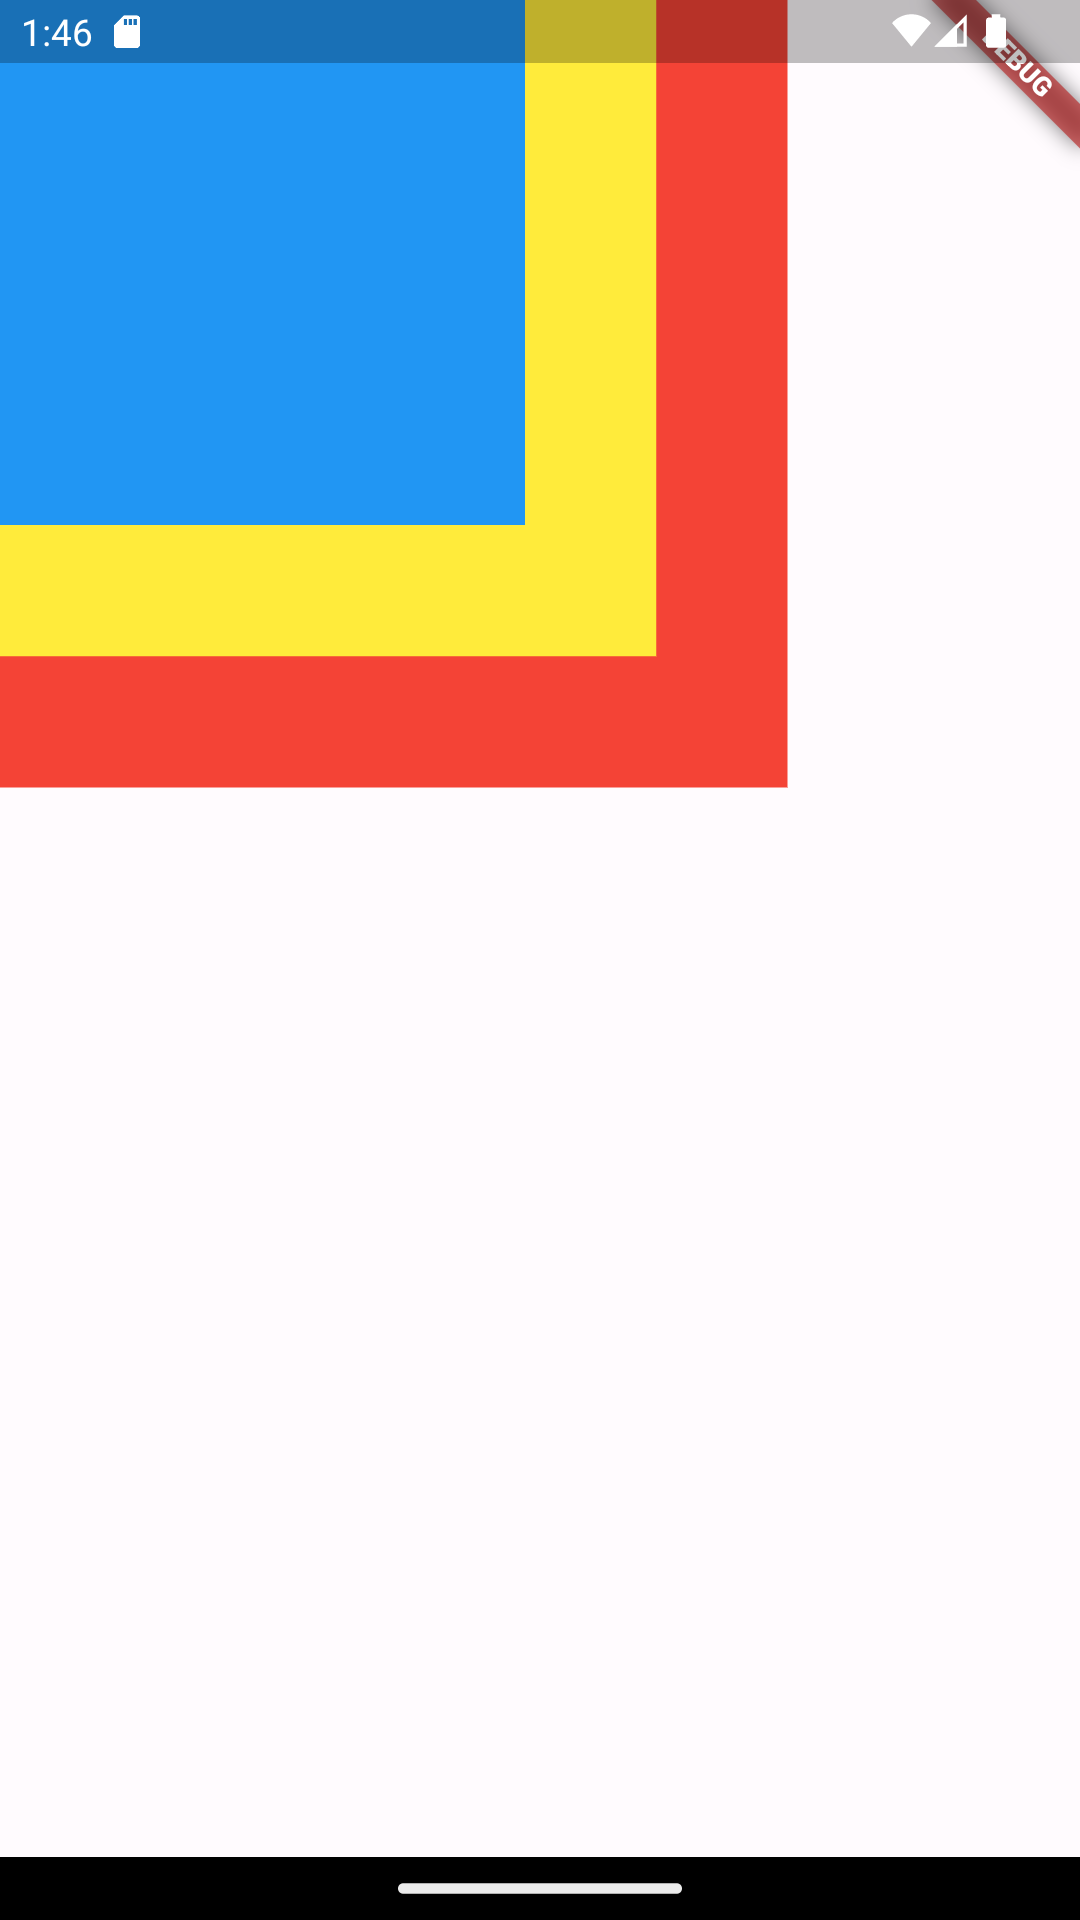
Stack 위젯
위젯을 겹치는 기능을 제공한다.
import 'package:flutter/material.dart';

void main() {
  runApp(ColumnWidgetExample());
}

class ColumnWidgetExample extends StatelessWidget {
  @override
  Widget build(BuildContext context) {
    return MaterialApp(
      home: Scaffold(
        body: SizedBox(
          width: double.infinity,
          child: Stack(
            children: [
              Container(
                height: 300.0,
                width: 300.0,
                color: Colors.red,
              ),
              Container(
                height: 250.0,
                width: 250.0,
                color: Colors.yellow,
              ),
              Container(
                height: 200.0,
                width: 200.0,
                color: Colors.blue,
              )
            ],
          ),
        ),
      ),
    );
  }
}
7장. 앱을 만들려면 알아야하는 그 밖의 지식
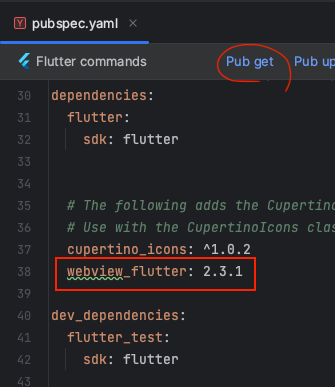
플러그인 추가 방법
플러터 프로젝트 생성시 자동으로 생성되는 pubspec.yaml 파일에 원하는 플러그인을 추가하고 [pub get] 버튼을 눌러준다.
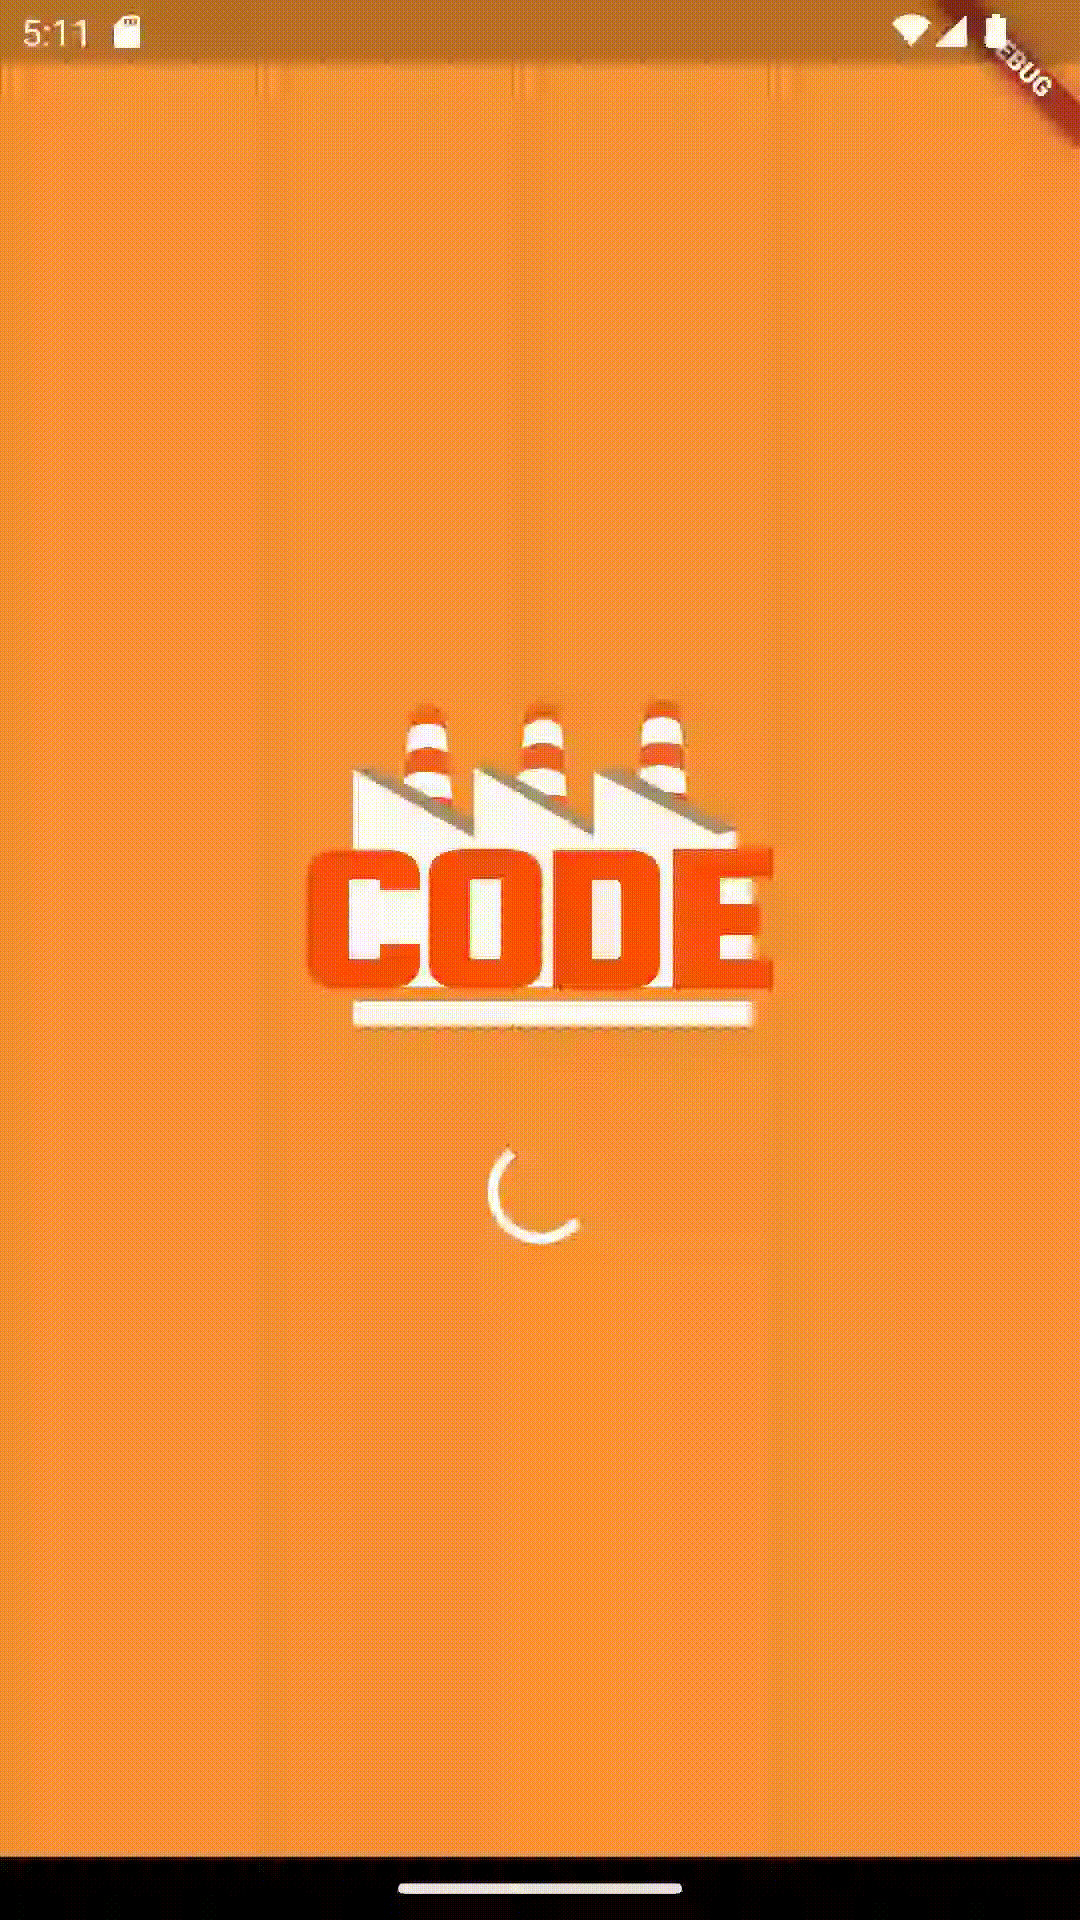
연습용 앱 만들기 : 스플래시 스크린 앱
사용자 정의 위젯 만들기 : 스테이트리스 위젯
import 'package:flutter/material.dart';

void main() {
  runApp(SplashScreen()); // SplashScreen 위젯을 첫 화면으로 지정
}

class SplashScreen extends StatelessWidget {
  @override
  Widget build(BuildContext context) {
    return MaterialApp(
      home: Scaffold(
        // 중앙 정렬 위젯
        body: Center(
          // 글자를 화면에 보여주는 위젯
          child: Text('Splash Screen'),
        ),
      ),
    );
  }
}

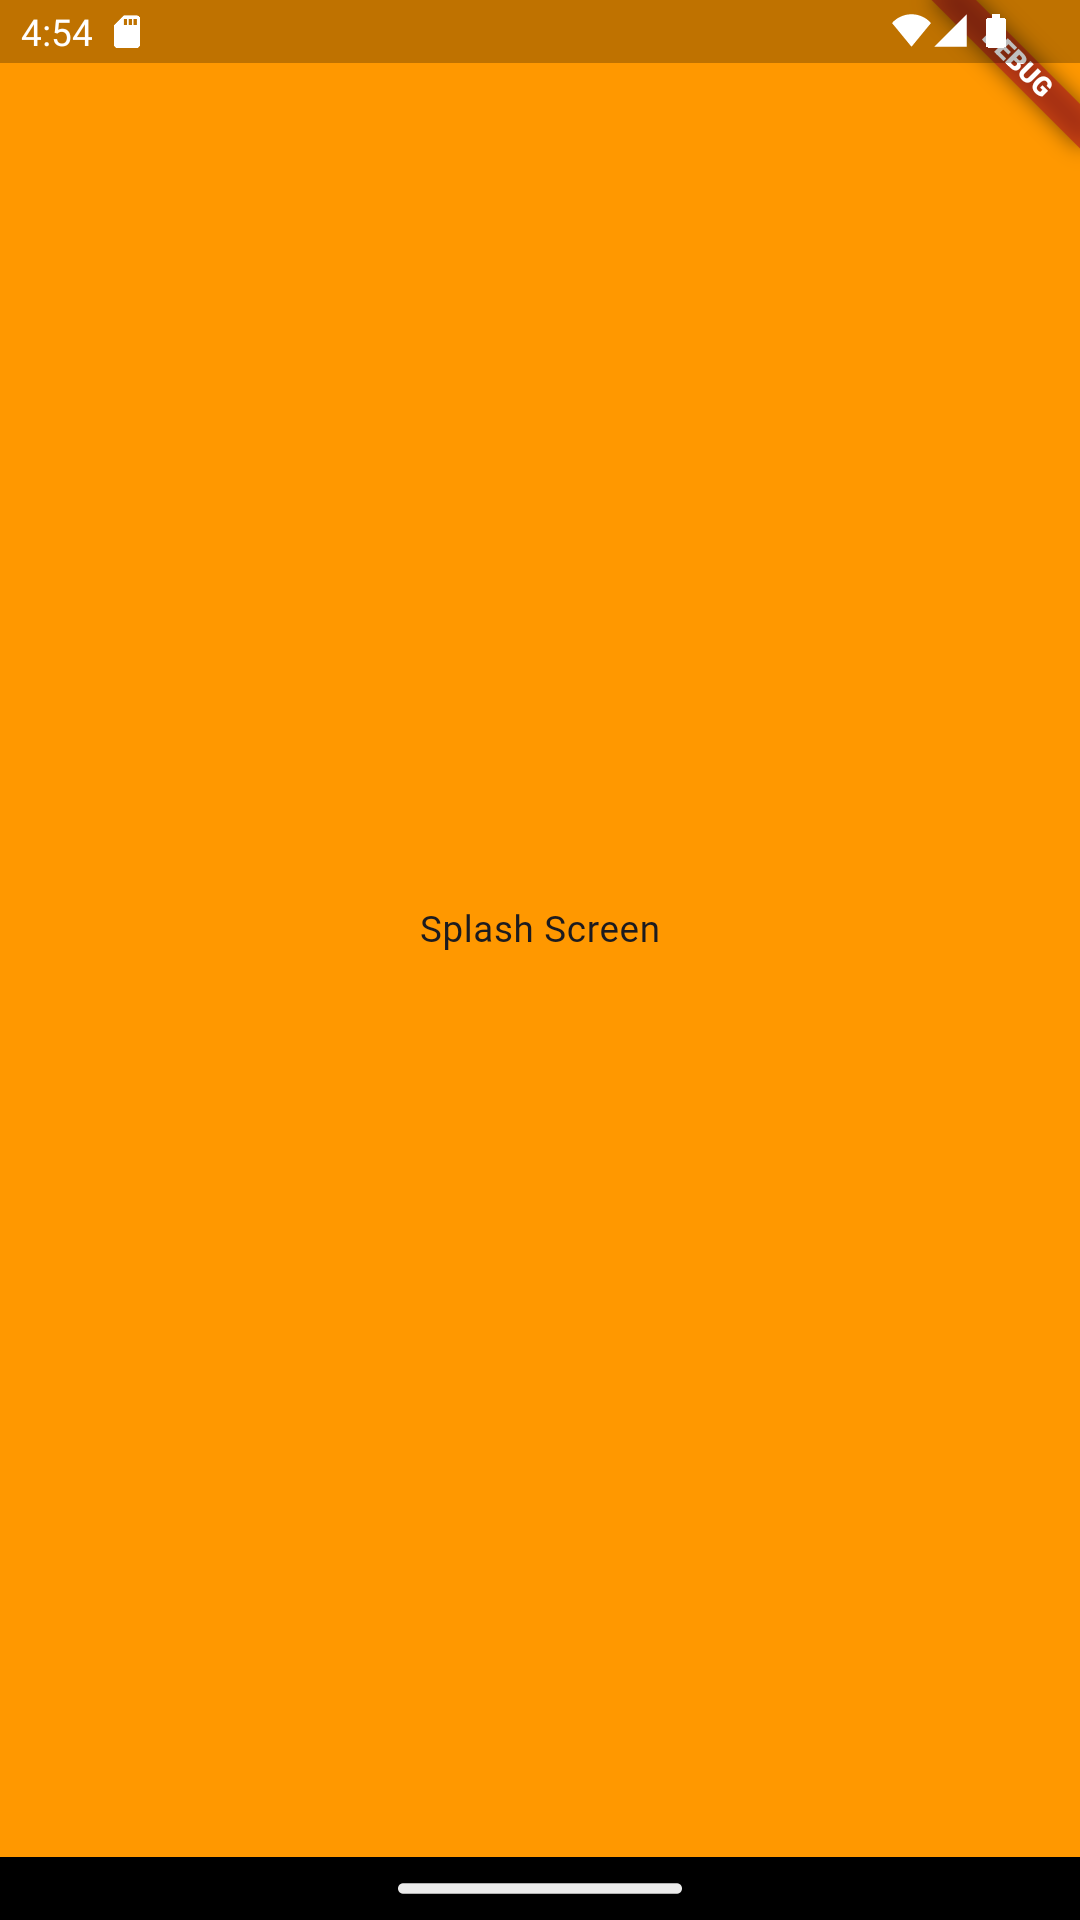
배경색 바꾸기 : Container와 BoxDecoration 위젯
import 'package:flutter/material.dart';

void main() {
  runApp(SplashScreen());
}

class SplashScreen extends StatelessWidget {
  @override
  Widget build(BuildContext context) {
    return MaterialApp(
      home: Scaffold(
        // 컨테이너 위젯
        body: Container(
          // 컨테이너를 디자인하는 클래스
          decoration: BoxDecoration(
            color: Colors.orange,
          ),
          child: Center(
            child: Text('Splash Screen'),
          ),
        ),
      ),
    );
  }
}
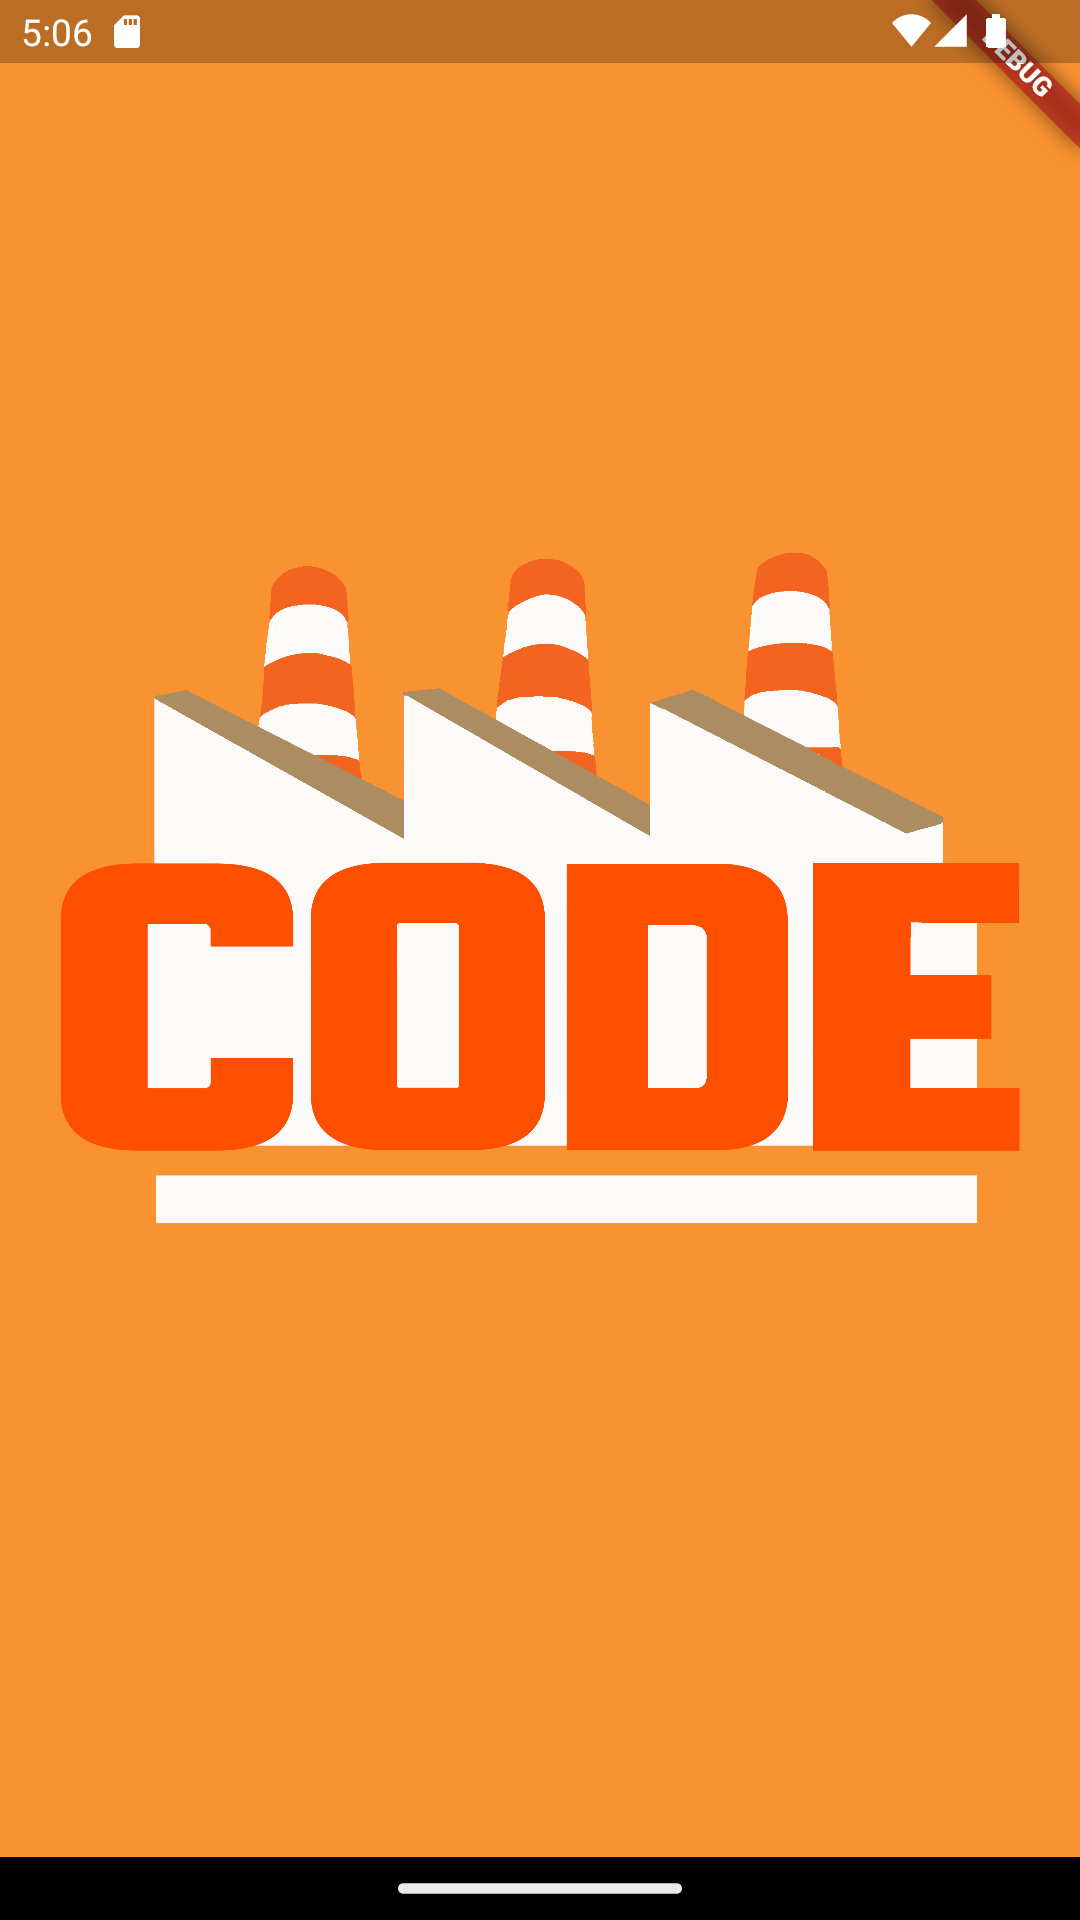
이미지 출력하기 : Image 위젯
프로젝트 최상위에 이미지를 담을
assets폴더를 추가한다.pubspec.yaml파일에assets폴더를 추가한다.flutter: # ... assets: - assets/ # ...[pub get] 버튼을 눌러
flutter pub get을 실행한다.코드 수정
import 'package:flutter/material.dart';

void main() {
  runApp(SplashScreen());
}

class SplashScreen extends StatelessWidget {
  @override
  Widget build(BuildContext context) {
    return MaterialApp(
      home: Scaffold(
        body: Container(
          decoration: BoxDecoration(
            // 로고 배경과 같은 색으로 변경
            color: Color(0XFFF99231),
          ),
          child: Center(
            // Text 위젯을 Image 위젯으로 변경
            child: Image.asset(
              'assets/logo.png',
            ),
          ),
        ),
      ),
    );
  }
}
위젯 정렬하기 : Row & Column 위젯
import 'package:flutter/material.dart';

void main() {
  runApp(SplashScreen());
}

class SplashScreen extends StatelessWidget {
  @override
  Widget build(BuildContext context) {
    return MaterialApp(
      home: Scaffold(
        body: Container(
          decoration: BoxDecoration(
            color: Color(0XFFF99231),
          ),
          // Row 추가
          child: Row(
            mainAxisAlignment: MainAxisAlignment.center,
            children: [
              Column(
                // 가운데 정렬 추가
                mainAxisAlignment: MainAxisAlignment.center,
                children: [
                  Image.asset(
                    'assets/logo.png',
                    width: 200, // 너비 추가
                  ),
                  // 로딩 애니메이션 추가
                  CircularProgressIndicator(
                    valueColor: AlwaysStoppedAnimation(Colors.white),
                  ),
                ],
              ),
            ],
          ),
        ),
      ),
    );
  }
}